Sunday, July 31, 2011

Peppered Chicken Tomato

I was the one who concocted this recipe since I don’t find any online recipe that will match what I have in the fridge. Since I wanted it simple and the cooking time and preparation was quick, I have come up with this simple but very tasty recipe.

Peppered Chicken Tomato for Dinner
tomato chicken


For those whose tongue was not meant for chilly types of recipe, this one may challenge you. Although if you don’t want it to be too hot, you can control on putting the amount of chili powder on the chicken and then try not to put ground black pepper.

The secret for this recipe is to marinate it first with ginger and garlic paste. Wash the chicken first and then rub salt into it and wash it off again. Marinate with ginger and garlic paste and put salt and ground black pepper. Leave it for 30 minutes before cooking it in hot oil.

While you marinate your chicken, cut some fresh 2 medium sized tomatoes, 2 cloves of garlic, 2 medium size onions and 1 inch size of peeled and chopped ginger. The next step will be putting the marinated chicken into the pan. Do not put oil into your chicken, just juice up the chicken first and when it is dry, that is the time you can now put your oil. You may use vegetable oil or olive oil for frying your chicken. What I just used was a regular vegetable oil.

Make sure the chicken is golden brown in color and keep it on the side of the pan as you put the next ingredient to sauté like garlic, ginger and onions. Make sure that the garlic is light brown in color before you put the onions. You may add salt while you sauté your garlic and onions. After this, you can now add the ginger.

Smells so good because of the ginger garlic paste
chili chicken


Stir the sautéed garlic, ginger and onions into your chicken and put one tbsp. of chili powder into it. Make sure the flame was put to medium so that it won’t stick at the bottom of the pan. You may also add two tablespoon of water so that the chili powder won’t get a burnt taste.

After this, you need to put the chopped fresh tomatoes and let it be mushy before you add more ground black pepper into your chicken and some salt to taste. Stir well and leave for another 3 to 4 minutes. Your tomatoes should not be mushy but this time it should be drier and sticking to the chicken which will infuse its flavor. You may also try to add chili paste and oil if you want extra hot and chili flavor into your chicken. You may use canned tomatoes if you want but fresh tomatoes are still a better option for this recipe.

Saturday, July 30, 2011

Chocolate Caramel Pudding

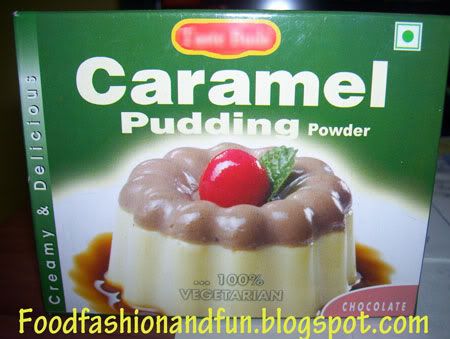
Now this one is really the quickest way to make a pudding. I am not talking about left over bread that needs to be baked again. They call it pudding here but it does look like gelatin to me but anyway I haven’t used any eggs in here. It was just milk that the packet requires.

Chocolate Caramel Pudding for me to try
gelatin


I don’t regularly buy instant desserts such as this one but out of curiosity, I did try since the box was kinda appealing in the eyes. Although I knew from the start that in order to make the same outcome just like in the picture, you need to layer it in two which is like vanilla or milk at the bottom and then the chocolate on the top portion.

Of course the mixture given was chocolate flavored so I will only be getting only one color tone and it was brown. In the packet they have included a caramel sauce to mix with the pudding. The instruction was just easy since you needed only 500ml. of cows’ milk and boil it. Once it reaches the boiling point that is the time you need to mix the powdered ingredient and put it into medium flame as you stir.

Just poured the caramel once the pudding is hard enough
pudding


Once the consistency is fine and the granulated mixture is gone, you can now put off the stove and keep it aside to cool down. But not too long because it will harden so place it in a container and keep it in the fridge. After 15 minutes, you need to get the pudding and put the caramel on top. Now this caramel will be hard to squeeze so try to heat up the packet before opening the pack.

The caramel automatically spreads in the container after an hour of placing it back in the fridge. I have showed the sample picture and as you can see there are bubbles produced on the side before it cooled down. No need to add sugar or such. The taste was just enough although not that great since I know that it is much better if I have done it manually. But anyway, as I have mentioned, this was a test for the chocolate caramel pudding that I wanted to experience eating.

The caramel spreads automatically after one hour inside the fridge
caramel


My hubby is not a fan of sweets so I got the opportunity to eat it solo. I only gave him three tablespoons and he said it was enough. He is not a sweet tooth monster like I do. Anyway, I am just another blogger who wants to try out foods here so I have shared this one for you.

Friday, July 29, 2011

Egg Hakka Stir Fried Noodles

This is my version of pancit canton in my own country but here in India they call it Hakka noodles with egg. It was easy to cook and prepare so I suggest my fellow friends here who regularly reads my post to also try this recipe.

Yummy Egg Hakka Noodles sprinkled with spring onions
egg hakka


It needs veggies like cabbage, carrot, green beans, capsicum, tomato and spring onions. But in this presentation what I have was carrot, cabbage and spring onions only. You can also use chicken and shrimp in this recipe. But what I did use was chicken liver and it was just tasty.

Hakka noodles have wheat, soya, peanuts, milk and tree nuts and they have a warning at the back of the label for people who have sensitivity or allergy to the said ingredients. Some Hakka noodle packets do have flavorings included, but this one does not have and it’s with egg which is considered non vegetarian meal.

Anyway I have no issues on this one. It is still healthy to prepare for my family and delicious. You just need to boil the Hakka noodles for 5 minutes and drain the water and keep it aside. The next step for you is to sauté it in garlic and onion and the chicken meat which I used was liver but if you have shrimp then its better.

Still cooking the noodles here so no spring onions yet
pancit


After this you can now add the tomatoes and cabbage and season it with soy sauce and ground black pepper. Once your cabbage is half cooked you can now add your hakka noodles and then add some salt into it and stir gently so that the noodles would not be mashed. The last ingredients that you will need to put were carrots and spring onions. The carrot should not be overcooked. It is better to eat it half cook and still crunchy as well as the spring onions for toppings.

You don’t need to put too much water in this recipe. If you think the noodles sticks at the bottom of the pan, then just two tablespoons of water will do and just put the flame into medium to slow heat. As I have said, you don’t need to overcook this one since the noodles are already boiled before you stir fry it with the sautéed veggies.
My bowl of noodle goodness, seasoned with soy sauce and lemon
pancit ito


Some people do add MSG or monosodium glutamate in their dish, but as for me, it is not healthy to consider such so I don’t use MSG in any of my cooking or recipes. But if you like to add, go ahead as long as it is in moderation. Noodles like this are always good to pair with tasty breads and fried finger foods such as spring rolls. I also suggest that you squeezed out a lemon and put soya sauce as you eat it…Bon Appetit!

Thursday, July 28, 2011

Indian Spices Part 2

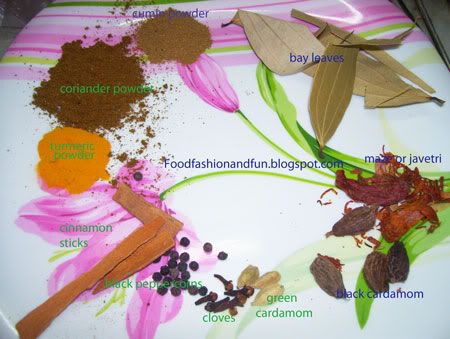
This will be the continuation of the food recipe for Hydrabadi Chicken Biryani. Although I do have a blog about Indian spices so I interconnected this one too so that some of you may be familiarize with other spices that we use here in India to make a great dish.


Indian Spices for Chicken Biryani Recipe
biryani spices,ingredients,india


Since I owe my readers about the ingredients that hubby included when he cooked Hydrabadi Chicken Biryani, here is now the list:

Ingredients:

Cumin powder- 1 tbsp.
Coriander powder- 2 tbsp.
Turmeric powder- ½ tbsp.
Red chili powder- 1 tbsp.
Jeera or cumin (white)- 1 teaspoon
Cloves- 3 to 4 pieces
Bay leaves- 2 pieces
Black cardamom- 2 pieces
Green cardamom- 2 to 3 pieces
Javetri or maze- 2 pieces
Cinnamon stick- 2 sticks
Black peppercorns- 5-6 pieces
Fried onions- 3 to 4 medium size
Ginger-garlic paste- 1 tbsp.
Fresh green chilies – 2 pieces
Mint leaves
Coriander leaves
Lemon – 1 big size
Plain yogurt 500ml
Chicken ½ kilo
Salt to taste


Method for Cooking/ Preparing Hydrabadi Chicken Biryani:

Step 1: Clean the chicken well before marinating. Mix all the ingredients above except for lemon. Keep it marinated for 1 hour or more.

Step 2: Soak the basmati rice for 30 minutes. After this, you can now cook the rice by boiling water with salt and oil. Once the water boils, put the soaked basmati rice and cook it only 50% done (half cook).

Step 3: Once your marinated chicken is done for marinating, put it is a deep pan and cook it till the chicken meat is tender, do not over cook. Once the water in the chicken is gone, that is that time you can now put on top the half cooked basmati rice and cook it till the rice is properly cooked. Layer it with another fried onions, coriander leaves, mint leaves and sliced lemons. Put the cover and make sure it is tightly sealed to blend the flavors in the chicken and basmati rice.

Step 4: Serve while hot, best to combine with raita.

If you want to read the previous post I have for Indian spices click here: Spices of India
Here is the link for the post for part one of Hydrabadi Chicken Biryani: Yummy Hydrabadi Chicken Biryani


Hope you do like the recipes, just write me here or leave a comment if you do have any queries. Thank you and hope to keep you posted for more exciting recipes and foods.

Wednesday, July 27, 2011

Hydrabadi Chicken Biryani

When hubby takes his off, I am sure that I can relax a bit in the kitchen for I know that he will be eager to prepare something. I was not wrong, he did prepare chicken biryani but not the same biryani he prepared in the past post that I have which you can compare if you would check my blog about it..Chicken Biryani

Delicious Hydrabadi Chicken Biryani
chicken biryani,hydrabadi


I must say practice really makes perfect, and this time his biryani is really tasty and delicious, the basmati rice was perfect and not over cooked or sticky. The chicken that was marinated with spices really seeps deep and I can say that this is truly Hydrabadi Chicken Biryani especial and one of the best recipes my hubby cooked.

The preparation was not the same as the first one since all the spices he gathered first before mixing them with chicken while the basmati rice was soaked for 30 minutes before cooking it in water which is to be half done.

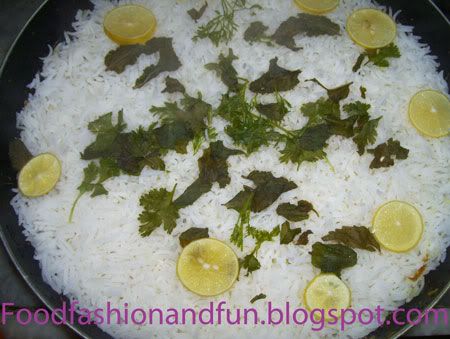
Second layer of basmati rice, topped with mint leaves, lemon and coriander leaves
long grains,basmati rice,biryani


I will be posting here the spices needed for marinating your chicken so just stay tuned for the link that I will share on my other post. Now going back to chicken biryani story, you can use different chicken parts here with bones. You also need to buy plain yogurt because you will mix it together with other spices for marinating your chicken.

You would also need a deeper pan where you can place your chicken and top the half-cooked basmati rice on top of it. Be sure that the lid is tightly sealed or else you can use a cheese cloth and cover the lid so that the steam would really infuse the rice and chicken together.

You can marinate your chicken for an hour but if you’re not in a hurry to cook, the longer your chicken is marinated the better. But don’t over soak your basmati rice. It should only be done for 30 minutes and cook it in water which you can put a bit of oil and salt and it has to be 50% done, not fully cooked rice since you need to top this half cooked rice into your chicken.

Basmati rice has longer grains and a very aromatic smell
basmati rice


Once you’re done marinating your chicken, you need to put it in a pan and let the water from the chicken juice out while it is in medium heat. When you can smell the aroma of your chicken, just check the water but don’t let the chicken ran out dry at the bottom of the pan because this means your chicken is already done and you should have already added the half cooked basmati rice on top.

Biryani should be in layer so meaning the second topping of rice will have to include some ingredients like mint leaves, coriander leaves, lemon slices and fried onions then layer it again with rice. See to it that the flame is in slow heat so that you won’t over cook the chicken and the rice. Tightly sealed lids will make sure that your cooking your rice better and the moisture of it will make the rice softer but not sticky.

I really enjoyed the whole day of eating Hydrabadi Chicken Biryani. We just did not include any food colorings into it. But if you want some color, you can try to include saffron into it. Hope you did enjoy this wonderful dish which is truly authentic Indian cuisine.

Tuesday, July 26, 2011

Yema with Almond Nuts

I’m missing to eat these so called “Filipino sweets” and so I made my home made yema. Yema is a candy that is made out of condensed milk which you can also combine some fruits like jackfruit or you can use some nuts. Since I don’t have peanuts, what I used for this recipe was almond nuts.

Yema Balls with caramel
yema


I just roasted the almond nuts before grinding it into the mixer. Yema is just so easy to do although you needed to stir most of the time so that it won’t stick at the bottom of the pan. So you better prepare your non-stick pan for making yema and a wooden stick to stir the condensed milk.

Some prefer to use fresh cow’s milk and include fine sugar into it. But this type of process would take so much time since you needed to make the mixture so thick and it needs more time for you to stir. So if you are not that patient enough to stir, you can do the short cut method by using sweetened milk instead of fresh cows’ milk.

Almond nuts that I used for yema
almonds


Cooking yema should be done on a medium to slow flame. You can easily know once the mixture is ready when the milk started to change in color, which is brownish in color. But before it turns into brownish, you should have already included the jackfruit bits or if not, the nuts. But what I prepared was almond nuts so this is the one that you can see on the picture.

Some like their yema as plain; some would prefer it to be coated with caramel. You can also shape your yema into a pyramid (the traditional shape) or in balls. What I just presented was for us to consume (at home) and that is why I did not prepare to buy a colored cellophane wrapper to present it to you the way they sell it in the market.

Cooling down the yema before shaping them and putting some caramel
yema with nuts


This recipe is always a profitable business for home makers because they can sell this candy to their friends, officemates and neighbors. All you just needed is a good and clean presentation or packaging which is colored cellophane and shaping your yema into balls or into pyramid types. But as for me, for now I would just like to eat it together with hubby.

Kids would surely love to taste this chewy candy. I used to remember when I was a young kid; I helped a classmate of mine to sell yema in our classroom. The profit I made instead of buying something, I keep it for an investment to buy more yema to sell it to friends. I did not realize I was already a business minded person during those days! Well, anyway maybe I have already given you some ideas for you to start your own simple business at home especially if you are a mom or soon to be mom just like me. Cooking is indeed fun when you have the passion.

Sunday, July 24, 2011

Capellini Carbonara Sunday

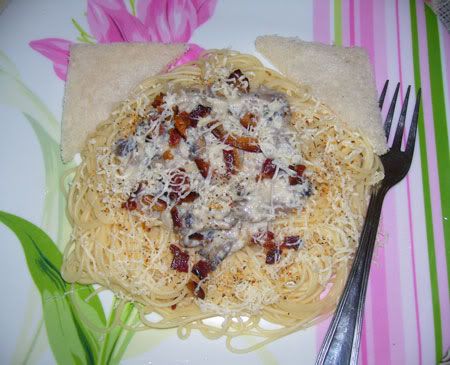
I would like to use the pasta that we bought so I tried to cook a different approach carbonara. Capellini is Pasta which is thinner than the regular spaghetti pasta. What I have was no. 1 so it was really fine in texture and thinner but I don’t mind to use it for my carbonara recipe.

Pasta Sunday, sit back, relax and enjoy this meal!
carbonara


What I did for my carbonara today is simply different from the carbonara ala pobre that I have showcased here, you can check that recipe here if you want to...Macaroni Carbonara ala Pobre

I didn’t include any all purpose cream for my dish today. So what I incorporated was egg and fresh milk which was just perfect for the cream of my pasta. The taste was even as close to authentic Italian carbonara which they only use egg and cheese for their sauce and without any mushrooms and heavy cream.

What I do like in this recipe was that the sauce was just right to the taste when I sauté it in garlic and onion. I just sprinkled some Maggi ginisa mix to my mushrooms to have a salty taste. I didn’t put more salt because what invigorates this dish is the pancetta which is the Italian bacon.

I had compromised for today since we don’t eat pork, but for the sake of trying to cook this recipe, I did include it but for those who don’t eat pork, you can just skip on including the bacon and try chicken instead.

This pasta could have been much better if there was a Pizza! woohlala
capellini carbonara


If you are also going to use capellini, you need to just boil it for 4 minutes and don’t overcook this pasta else you will be very disappointed. It is thin so the moment your 4 minutes of cooking is done, drain its water and wash it off in cold running water and set it aside while you prepare your sauce.

Preparing this meal is easy since you only need to sauté your mushroom for 5 minutes and then mix the sauce (egg and fresh milk) into it. Just don’t forget the grated cheese. You can use pecorino or parmesan cheese but if you don’t have a budget for such expensive cheese, then regular cheddar cheese would do.

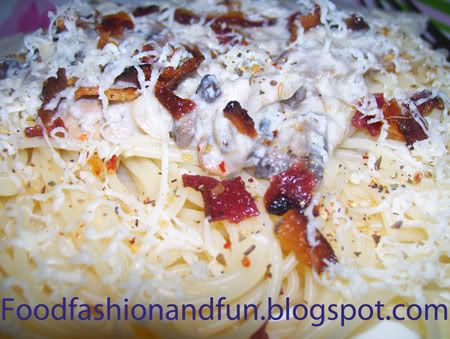
Capellini pasta in carbonara with pancetta bits sprinkled with oregano and spices
capellini


You can now garnish your pasta with the creamy sauce that you make and sprinkle it with pancetta, cheese and parsley. But on my part, what I did sprinkle on top of my capellini carbonara was oregano bits mixed with some ready-made spices.

This dish is perfect to match with garlic bread or any toasted bread of your choice. It can be your perfect lunch or dinner, or snack whatever you may like it to be served. Just another Sunday to relax and unwind with the family and this is pasta time for us. So friends, here is what I wanted to share for this day. Hope you do like this recipe. If you do have questions on this recipe, you may leave me a comment here or write me and I will be happy to reply you back.

Saturday, July 23, 2011

Healthy Granola Bars and Muesli Cereals

At first when I tasted a granola bar of different brand I was not impressed because it was scrapping my gums and it was so difficult to chew. My mouth feels so dry and the sides of my mouth get a scratch from chewing the whole bar. It really feels like I am also chewing a grass because of the taste. Probably that time what I took from the grocery shelves were cheap types of granola bars. I was just curious on the oats and wheat included into it.

A healthy breakfast and a healthy snack
granola bar,fruits,nuts


Although there are lots of flavors and brands out in the market, I may not single out this one from Nature Valleys’ chewable granola bar which is perfect for me. It has nuts and dried fruits included like almond, peanuts, cranberries,raisins, oats and I personally like it as a snack. Whenever I feel hungry, I’d be taking a bar and eat it. Most of pregnant women are hungry and sometimes even at wee hours when I wake up to just pee, I still feel that my stomach is hungry and no matter how lazy I am to get up or open my eyes, I would not hesitate to go and grab a bite.

It is important to read what's written at the label
labels


I do consider what is written at the back of the label and from granola bar, I took the liberty to pattern the same thing on selecting my breakfast cereal. I just got so tired of my honey stars so I said to myself, hey! Why not try to get Muesli. The carton ads seems to look appetizing or appealing but when I opened the carton and pour out that crunchy multi-grain goodness with mixed dried fruits and nuts, well the cereals were a bit smaller than what I expected although the taste was really awesome.

I can go eat choco and honey cereals without cold milk but definitely I wouldn’t be able to chew Muesli alone without milk. Anyway this is healthier to consider for a snack or for breakfast. I don’t mind if I take it as a breakfast dinner because it will still make my tummy full and feeling so complete unlike any other breakfasts that I can think of.

Rich in fiber, vitamins and minerals
chewy,granola


So what does make you stop for a while and think when buying items in the grocery? If I do prove that one product is good for me, I’d stick to it and the next time I would go and visit the grocery, I’d b picking up the same brand. Although I don’t close my doors to new products which also offers promising quality and the price is just right for my budget.

Muesli is just expensive compared to a regular box of chocolate and honey cereals. Well the ingredients shows why it was expensive and it was just reasonable for them to price it. Although on those granola bars, well it was imported because nobody produces the same thing here in India, so the prices would be stiff and I won’t say I can do buy this for every week of grocery, but if I really, really do have the money or budget, I would love to include this healthy bar every week for my grocery. Does your grocery list also include granola bars and Muesli cereals?

Friday, July 22, 2011

Hongkong Noodles and Vegetable-Cheese Grilled Sandwich

I wasn’t able to post new articles in the last three days because our internet was down. It was really a headache since I am trying my best to update my site everyday so that my readers would not get bored when they visit my site.

Anyway so much for the rant, I just wanted to share these two foods that I have tried. Yes, I just bought it and not prepared it. It was raining continuously and I was really minding the leak that we have in the kitchen, it was really annoying although what can we do, we’re just renting the place, hope we can find a better one if we have the opportunity.

Big yummy vegetable sandwich for vegetarians!
vegetable sandwich


Going back to the foods that I am talking about, well the noodle variant is quite unique to me but at the back of my mind, something already tells me that it will just be a bluff and another replica of what they just name noodles around here where in fact the noodles here in India are LIMITED, meaning they are made the same, their textures and tastes are the same therefore, this noodle, even if they assigned a name on it, will definitely be tasting the same with others.

It was reddish in color looking like spaghetti but this is not pasta. This is also made out of hakka noodles (wheat). The vegetables included were cabbage, capsicum and carrot and they have just added some Kashmiri Chilli to make it a bit spicy, but not too much although it was really oily and I can’t find anything else tastier to my palate.

Looking like spaghetti but it's not...
hongkong noodles


The noodles tasted a bit burnt and it does not have anything exciting on it. I was ordering for shrimp schezwan noodles but they don’t have it at the moment, so I did choose only those in the vegetarian dish list. I really regret buying this one but anyway, just for experience sake so by next time I hear this menu again, I know what it is and I will really avoid it, ahhh only to that particular restaurant, I didn’t mean all restos would prepare it the same way.

The price is just cheap for only Rs60.00 and it serves good for two to three persons. I am still on my venture to look for more interesting noodle dishes here but I guess it will take some time if I had to try and visit foreign restaurants that operate here in Mumbai alone.

About the sandwich, well at least I can give it a rate of 4 out of 5 stars. It was really good for vegetarians because it contains fried potatoes, spinach paste, coriander, tomatoes, onions, cucumber bits, red beets, cabbage and carrots that are also grinded into a paste and the rest on top was cheddar cheese.

The sandwich was grilled and not toasted. The price was also cheap which is also Rs60 and is good for 4 people. Indeed if you wanted to trim down, you can just order this type of sandwich for your lunch and it will make your tummy full but with no guilt because it is made healthy.

Thursday, July 21, 2011

Honey Lime Chicken with Rice

I saw this recipe posted online a few days ago and a lot of people favored it and said they liked it. I did used lime here since I don’t have lemon so if you wanted to try this recipe, then two tablespoons of lemon will do instead of lime juice.


Honey Lime Chicken which tastes like chicken adobo with a twist
chicken with rice


About this recipe Honey Lime Chicken with rice, it does taste a lot like our very own local recipe called Adobo although you don’t include vinegar in this recipe and the preparation is not the same. It was just easy to prepare and it does not need a lot of complicated ingredients. All you needed was chicken thighs, garlic, onions, soy sauce, lemon or lime, honey, chicken broth, olive oil and long grain rice.

I did put only one tablespoon of honey because I don’t want it to be so sweet. But if your tongue likes to eat sweet foods, then I suggest two tablespoons of honey will do for you. First step that is needed is to fry the chicken in olive oil. Once it gets brown, set it aside and use the remaining oil for sautéing garlic and onions.

Once your garlic and onions are done, you need to put 2 cups of chicken broth, lemon juice, soy sauce, and honey. Simmer it for 2 minutes and then add the chicken that you have fried.

The next step is to put the long grained rice which is only 1 cup. Keep the flame into medium heat for 3 minutes and the next 3 minutes you need to keep it slow. If you don’t know to measure the water in your rice, then the easiest solution that I can give you is to just put the ready cooked rice into the mixture.

What I did here is I just mixed the ready cooked rice and kept the flame slow so that the rice would not stick at the bottom. It does look like a Pulao recipe (Indian dish) but the taste was more of like chicken adobo (Filipino dish). Well anyway, this dish is good to combine with plain yogurt or fresh cucumber.

This was just local rice in India, you can use brown rice if you want
chicken lime


The only thing that I really didn’t enjoy much when I tried this recipe is that it was too oily for me. I don’t know, maybe I have put more olive oil into the dish, so for you people who would like to try this recipe, when cooking your chicken, just put small amount of olive oil so that it won’t be too oily.

You can also use brown rice for this recipe although brown rice tends to be cooked longer than the regular grains. I do hope you can also try my other chicken recipes posted here. Enjoy cooking and eating!

Wednesday, July 20, 2011

Cantaloupe Shake

We have a lovely melon at home that I make a smoothie out of it so this will be my entry for today’s blog. I don’t have much collection of fruit drinks here but it will be a good start for me to line them up and start also a series of lovely fruit or cocktail drinks. Anyway this one is so easy to prepare and you can add so many things to it according to your liking.

Melon Shake Anyone?
melon shake


Melon fruit shake or cantaloupe is one of my favorite fruit smoothies. My mom used to prepare this by scraping out the flesh of the melon (of course the seeds are already taken off) and then mix it with evaporated milk and course white sugar and ice. This preparation needs no blender or mixer. You just need purified water and mix the said ingredients.

What I did for today was use a blender because I don’t have a fruit scrapper just what my mom used to make. I included condensed milk (sweetened) instead of using evaporated milk. I also included two drops of vanilla, crushed ice and water. You can also include any whey protein powder here if you have so that it will be healthier.

Melon has cooling properties and it is also rich in fiber which helps you in your digestion. But about the milk, well of course if you’re lactose intolerant then I suggest you skip on the milk and just use honey, few drops of lemon juice and sugar for a little bit of a twist in taste.

Eating melon is good for the skin, it rejuvenates and it cleanses our digestive system giving us a healthier glow. Just be sure that you chew this fruit well and not just swallow it. There are different varieties of melons in the market but I sure hope you know how to select a sweet melon or cantaloupe.

Cantaloupe smoothie, one of my favorite!
cantaloupe,smoothie


The outer skin should be firm and has no sign or color of a bruise (brownish) in color. Melons are pretty obvious fruits when sweet; the scent is really magnificent and enticing. If you think you cannot smell anything about the cantaloupe or melon that you are holding, then just skip it, it is not yet that ripe and done.

Once you make melon juice or melon smoothie, be sure to drink it and finish it all. Any left over in the fridge and keeping it for more than hours will make it taste a bit bitter especially if you have scrapped the bottom part of it near its skin. Make sure that you don’t include the white part of it because this will add only bitterness to your drink.

The clearance for carving off the melon flesh is that there is still color, not the pale white or greenish. You may filter the seeds and juice it up a bit before throwing it in the bin. You can try to combine other fruits like bananas in your melon smoothie to make it more exciting, but if you don’t like such, then leave it as is. Hope you do like to try cantaloupe shake to freshen you up when you feel hot.

Saturday, July 16, 2011

Chili Con Carne for Today

I haven’t tried this recipe yet and it was timely since I have minced beef in the fridge and some ingredients which will complete my recipe. I have heard this recipe long time back and I know that it originated in Mexico. I don’t know about how chili this recipe can be, probably depending upon the taste of the cook.

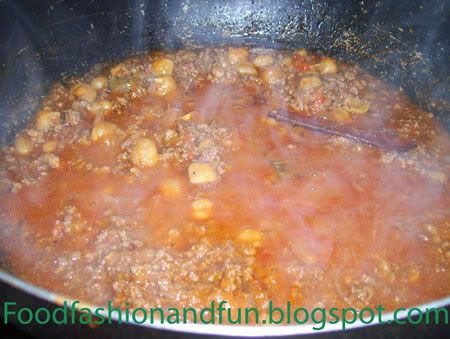
Yummy Chili Con Carne
Photobucket


I thought I may serve this recipe using only red beans, but since I don’t have, I will improvise using chick peas. Now the question is how long will I be able to finish this recipe? I need to soak the chickpea and use the pressure cooker to keep it soft before I include it in the mince beef.

About the spices that I am trying to use, I have chili powder, cumin powder and turmeric instead of paprika. As much as possible I will be using fresh tomatoes into this recipe and not the canned tomato puree. I will just need to blanch the tomatoes and peel it off and then put it in a blender so that I can have my very own tomato puree.

A closer look at chili con carne
Photobucket


Whew, next step is to check my other ingredients, which are bay leaf, cinnamon stick and oregano powder. I can also include dried thyme but I don’t have it for now so I will be skipping on that. All I needed to do is to cook the minced beef in pan till it gets brown before I include the tomato puree, some sliced onions and garlic and then my powdered ingredients.

I also use some tomato ketchup in this recipe to keep it tasting a bit sweet but not too much. As much as possible I wanted to balance the taste of chili, salty and sweetness of my chili con carne recipe. You may include red wine into this recipe if you have to keep the meat tender, but not too much of alcohol content. This is just an option, if you don’t have any red wine to use, then skip it, no problem if the taste will be different or not.

Steamy hot goodness of chili con carne
Photobucket


Once your minced beef is done and mixed with tomato puree and powdered spices, you can now put some beef bouillon or beef stock into it, just not too much for the mince beef to swim. Simmer it till the flavor seeps into the beef and then add the chickpea that you set aside earlier. If you have red beans their okay too as long as you cooked it well before adding it in this mixture. It took me 20 minutes using the pressure cooker to soften the chickpea, so the total hours of preparing this dish will be more than an hour. If you are not in a hurry to prepare your meal, you can definitely try this.

Don’t forget to put ample amount of salt and ground black pepper to taste. If you still want it to be sweeter, you can add course brown sugar, but if not then just leave it as is. Your Chili Con carne will be perfect to match with hot rice or bread and some hot soup. You can also garnish your plate with some plain yogurt to mix with this wonderful dish. Until then and hope you will also try this delicious recipe.

Nothing but Fried

I don’t have anything super exciting food to post since I didn’t prepare anything especial today since I consider my kitchen closed. Not actually that close coz where will I be able to cook if I do that, what I meant for close is that nothing so exciting happened.


Fried Chicken with unexpected hotdog and humongous sliced badami mango
Photobucket


I don’t have stocks, we didn’t buy any ingredients yesterday and I was really upset about it. I really don’t have the mouth to speak what I wanted to buy but I really felt so tired just yesterday so I was not in the mood to cook.

In fact what I just prepared now was just something for my hungry stomach to eat. I can’t think well on what to post if I don’t feel happy so my mood also has something to do with it. The rainy weather added more of my gloomy day and I really totaled the whole day to be so boring and unfriendly towards me.

I didn’t want to reflect this on the food that I wanted to cook but certainly that Chefs may also feel the same way; they can’t just give their best shot in cooking if they really feel something heavy inside. I just laugh myself out while taking the photo of what I am going to eat, it looks unorganized too.

If you see the picture clearly, you might say imbalance. Yes, very true, the dish isn’t complimenting anyone. The mango is the main obstruction as the size of it overpowers the chicken pieces. There were no greens (veggies) except the plate background and surprisingly, the hotdog would just like to say “what am I doing here?”

Sorry friends, it was just the time of the day that I can’t exert much effort if I really do feel drain. But hoping by next week, I can fully recharge my batteries and as well I can come up with much more exciting ideas to share here, for now please bear with my dryness. I really feel not so good about this week and I am totally down. Hope to get things better soon and I will post you the best.

Thursday, July 14, 2011

Garlic Butter Chicken

This is not the regular butter chicken in India where it is cooked with nice thick gravy. It is pretty obvious that the recipe I cooked today was dry and fried and the marvelous taste of tomato puree with ginger- garlic, butter and cardamom seeds infused deeply into the chicken so that you may really savor eating it even the very bones.

Garlic-butter chicken with cardamom seeds, ginger and green chili
Photobucket


The regular butter chicken is rich in gravy sauce and its orangey color suits well with the chicken that they usually include which is already a tandoori or grilled. If you may not know yet what a chicken tandoori is, you can check google on it and you will notice that the chicken is already orange in color.

Butter chicken is always served in Indian restaurants and they really taste exquisite. But this time, I highly favored to make a rendition of a butter chicken which is dry and with no heavy gravy at all and the smell of ginger and garlic makes it even more fantastic to the palate. I just wish that I can give more justice on how to present it in full photo detail which if ever I may be able to upgrade my camera, it would be such a tease to you my readers. But anyway, my point is to inspire you also to cook and try these recipes that I post here.


Frying the goodness of tomato puree in butter and garlic, smells so delicious
Photobucket


I just don’t keep delicious foods to myself, I share it here with my friends so that they too would be inspired to cook and have the same passion of preparing foods for their loved ones. So going back again to cooking and this recipe, what I did was just fry the chicken pieces into a separate pan. I just used salt for the chicken, if you may, you can include marinating your chicken with turmeric powder and chili powder, but as for what this recipe calls for, I only used plain salt for frying the chicken.

About infusing the flavor, well you need one tomato and chopped it into smaller size. Put butter in the pan and add some small amount of oil into it so that you won’t get your butter burnt in color. If you see the butter melted, you can now add maze and cardamom seeds. After this will be your tomatoes.

Make sure the tomatoes were already mashed and keep it aside to cool down before you place it in a mixer to make a puree. I still suggest doing this instead of buying a ready-made tomato puree; remember that original is the best so no added preservative is present in your food.

Once your puree is ready, you can now start to heat butter to another pan and put some oil into it. Once the butter melted, you can now add garlic into it. Make sure the garlic is golden brown before you put the sliced ginger (slice lengthwise) and 1 green chili (sliced also into lengthwise). After this you can now add the tomato puree.

Use a strainer to remove the skin of the tomato of your puree. No need to add water into the mixture. Mix the puree with what you are sautéing and keep the flame slow for 10 minutes. After this you may now add your fried chicken and keep it simmer for another 5 minutes. Just add salt to taste if you feel like adding more to the taste.
The smell of the kitchen is superb but the taste is more ecstatic, pushing you to the next level of cooking for more or eating for more whichever comes into your mind first. Hope you do like and try this delightful recipe, and I’ll be here keeping you posted.

Tuesday, July 12, 2011

What’s For Snack?

First of all friends, let me clear this straight, I am not endorsing the products that I posted here for the snack. It was just a representation of the food items that I was calling as “snacks”. What I have written here was not paid for nor did I ask for anything on behalf of the companies representing the food items on the picture. It is also not a product review because I won’t be dealing with what the products are all about.

Are All Snacks Good for Health? it depends, read the label!
Photobucket


It’s just another day in a life of a blogger that deals and talks about food. Whether it is a simple snack, dessert, food menu or fine dining experience, I write it all here in my site. I have these snacks ready dandy because if ever I feel hungry especially during late nights or early in the morning, a pregnant woman should always be eating if called for.

I find myself always hungry, at night even if I had my early dinner, I would still go for another round if hubby comes home after work and I would sit beside him and eat again. We don’t regularly sleep if we have full stomach, so the tendency is that when we watch or do something in the pc, we will still be eating some snacks.

I am not that choosy about snacks since I like to try new things that the market introduces. But definitely I am conscious of what was included in my snacks. For example the junkies that I have, well I see to it that there was no MSG included in it. Luckily these Kurkure’s are a handy, since they are made with Indian spices and lentils and do not have monosodium glutamate in it so it is safe for me to consume.

I also like cookies and mini cakes. It serves as a snack and sometimes it is also included in our breakfast so it’s like hitting two birds in one stone so I always see to it that I have a stock of cookies and some mini cakes.

Now that choco pie is a bliss! I can crave for salty foods but I would not dare to miss something sweet. I have been missing some marshmallows back home since I seldom find marshmallows here that will not be that expensive. I don’t know why they don’t sell much of marshmallows here which can be that affordable, but I am sure I can find ways that will still have marshmallows in it and that is why I have this choco pie as a substitute.

Dried fruits and nuts will always be part of our snack. In fact we do have dried dates, raisins and these pumpkin seeds that hubby really favor. It is considered as a healthy snack, not only for pregnant women but for all. I do take advantage of eating such since they are nutritious even if it is not that cheap to buy.

Eating snacks can either be healthy or not unless you realize that what you eat are just plain junk foods without any nutritional value or healthy ones that your body can get something good out of it.

Monday, July 11, 2011

Crunchy Potato Croquettes

If you have potatoes at home, you might want to try this recipe. It is considered a snack or you can also include this as a side dish to your meal since it is made out of mash potatoes.

Crunchy Potato Croquettes for you to try
Photobucket


The process is not that easy since you need to boil potatoes first and then mash them. But if you already have left over mash potatoes, the better because all you needed to do is to get an egg, mix it with salt and ground black pepper and then fresh milk. Not to much fresh milk because you don’t want this mixture to be watery.

Just two to three tablespoons of milk will do. But since I don’t have fresh milk, I tried to use two tablespoons of condensed milk and mix it with egg, salt and pepper. Again, you can include other spices if you like. For me, I just followed what was instructed. I should have been bolder to add ginger-garlic paste to this one and some chili powder. But anyway, this will do the trick.

Mashed potatoes dipped in egg and rolled to bread crumbs
Photobucket


The next step that you needed to do is to mix the ingredients. Scoop the mash potatoes using an ice cream scoop to be equivalent in size. But if you don’t have a scooper, then just a simple spoon will do and then roll them up looking like a mini ball and then dip it in a beaten egg and then bread crumbs.

Set aside all the potatoes that were rolled into a ball and then deep fry it in oil. Make sure that the oil is hot before placing those ball potatoes in. You can be assured that the potatoes are okay to remove from oil if it is brown in color. You can use any of your favorite condiments like ketchup or mayo to dip these potato croquettes.

As for me, you can see that I grated cheese on top. It is also good to dip it in any salad dressings or to whatever sauces you like to combine and experiment on these potato croquettes. If you like potatoes, I am sure you would also like this recipe.

You can dip this Potato Croquettes in any favorite sauce of your choice
Photobucket


It doesn’t give aromatic smell while cooking it. I wish I should have added that ginger-garlic paste to give some exciting scent. The taste for me is not that great if it were not dipped into my favorite sauce. This recipe could have been much tasty if I have included other spices. But anyway, so much for the rant, it is up to you if you wanted to add more fillings aside from mashed potatoes.

You can try to include some cheese or crab meat or chicken bits. You can explore more on other ingredients to match mashed potatoes, nothing can be wrong if you are just daring to try.

Sunday, July 10, 2011

Mini Subway Sandwich

It was another off day of hubby and we went out for a grocery. He does want to eat and prepare Vietnamese Beef Pho but I said to myself that it will take time so I better prepare something to eat before we take the soup.

Easy to Prepare Jackie's Subway Sandwich
Photobucket


Good thing that it was just easy to prepare, nothing much to sweat about especially if the ingredients that I wanted was already on hand. I have romaine lettuce, fresh cucumber, tomatoes, cheese, mayonnaise, ketchup, chicken salami and hotdog. I did not include any onions here, black olives and anchovies.

But anyway, it’s a selection on my part to get this altogether stuff inside that hotdog bun. It was not a special bun, just a regular bun without any sesame seeds on top. But if you happen to locate such, then you can use it. Another thing that you may add in here is mustard sauce which I don’t happen to have so I just used ketchup and mayo.

That lettuce sure is crunchy and match well with cucumber and tomatoes
Photobucket


You can also use pickled cucumber, but for me I don’t have a stock so I used the fresh and crispy cucumber that matches well with my tomato and romaine lettuce. I just used a regular cheddar cheese, nothing so fuzzy about it or used a bit expensive. In fact, the simplest subway sandwich ingredients that I can gather all together to make life easier and budget savvy for mommies out there who wants to try out this wonderful and delicious sandwich.

I have chicken salami which is just Rs65 for ¼ kilo and I fried only two pieces and slice it in the middle which is already good for two. You can have turkey salami if you want but that will be a bit costly. I just cut lengthwise the hotdogs to fit in the bun. But be sure to fry those juicy hotdogs before placing them in your sandwich.

I really like how the cheese hold firm the cucumber and tomatoes
Photobucket


We felt our tummy full right after we finish eating the sandwich. I was kidding my husband telling him to pay me since it was ordered from a restaurant. Actually I haven’t tried Subway sandwiches offered here. Most of them would contain Indian spices again, prepared and cooked in the way the Indians would like it, not the way how the westerners would prepare and like it. But anyway this is home cooked recipe so I was just happy that I had the time and privilege to prepare it and we really had a wonderful day eating it.

Saturday, July 9, 2011

Beef Shank Stew or Bulalo

It’s a rainy weather out there and sipping soup is the most delightful way to enjoy the day. I have decided to make bulalo recipe at home since I haven’t prepared it yet. I just don’t have the other ingredients here were I would be delighted to share in the photo if there were more greens. I was talking about petchay and Chinese cabbage (missing in action).

Tasty Bulalo, sorry guys no pechay available here
bulalo2


Anyway that white cabbage did something at least aside from sweet corn that we put also in bulalo, some people would even add banana saba but for me well, I can’t even find saba here.
For the beef shank, well I just added some more meaty parts and beef bouillon to make the dish more tasty. I really have to use the pressure cooker for this one to make it good to the bones. It was indeed a success and it was really oily and I might say that this dish is really not meant for people with high blood pressure or is having hypertension because it is rich in cholesterol, sorry guys.

Well, it’s just only once that I cook Bulalo or Beef Shank Stew and we’re of good health at least to try this meal. Besides, not every day we do this so just the time being that I have the chance to cook and give it a go. It is like cooking beef stew, the only difference is that you include corn cobs here and you select bony parts like the shank and other bone parts of the cow (excuse me if you’re vegetarian).

Actually I did enjoy cooking this recipe because I included lemon grass which most would not like to include in their regular bulalo. But for me, the scent of lemon grass makes it even more appetizing to sip the soup and the smell of your kitchen will also be aromatic and enticing. I don’t see anything wrong if you include lemon grass in traditional bulalo recipe. It’s like infusing something to enrich the taste.

Rich in beefy flavor, rich also in oil
bulalo1


I was able to tenderize the beef bones within 25 minutes of cooking it in a pressure cooker. I turned it off and then added the corn cobs and cook it again for another 7 minutes and the last thing that I added was the cabbage which I just put on top and covered the cooker but the flame was already off because this veggie is just easy to cook, so no need to turn the stove on again.
I just removed the lemon grass stalks so you won’t be able to see it in the pictures that I posted.

What I take as an advantage cooking beef is cheaper since most people here don’t eat beef. Hubby was able to buy those beef bones for only Rs20.00 (like it’s a giveaway) since he already bought some beef meats to go along with the bony parts. I still have more beef meat in the fridge for beef steak but I already showed Bistek Tagalog in my recipe so you can just browse it here again and read the recipe also.

Friday, July 8, 2011

Sweet and Spicy Orange Chicken

Before, I posted Lemon Chicken, which I did not cook but just ordered in a local restaurant. You can back read it here or browse and read more about it later on. What I did cooked and prepared was Orange Chicken. It is a famous recipe of the Chinese and I find it interesting to cook since we have stock of oranges and I have chicken in the fridge.

Enticing Orange Chicken which is sweet, sour and spicy
orange chicken


I just look online for the ingredients needed and I checked my stocks one by one and it was complete. I have just added some spice because sweet and sour for me and hubby will just be dull to eat if there was no spice so I put chili flakes on this beautiful dish.

Orange chicken can’t be that complicated to prepare. You just need to fry the chicken bits and set it aside and then prepare for the sauce that you are going to mix with the cooked chicken later on. I will post here what are the ingredients needed and the methods of how to prepare orange chicken.

Ingredients for Sweet and Spicy Orange Chicken:

Chicken (breast part)
3 tbsp. Orange juice (I did use 1 fresh orange here)
Ginger-garlic paste (1/2 teaspoon)
Flour
Cornstarch
Salt
Ground black pepper
Water
Vegetable oil
Egg (1)
Soy sauce (3 tbsp).
Vinegar (you can also use rice wine if you have) (3 tbsp.)
Spring onions
Brown sugar (3/4 cups)
Lemon juice (2 tbsps.)
Chili flakes (optional)
Sesame seeds (optional)

Methods for Cooking / Preparing Orange Chicken Recipe:

Fresh Oranges for this delicious recipe
sweet oranges


Step 1: Frying the Chicken: Before frying the chicken, cut it into bits or smaller pieces. Beat an egg and roll the chicken meat and then put it next to flour with salt and ground black pepper into it. Place on a separate plate and then fry in a hot oil. Keep the fried chicken bits aside while you still needed to prepare the sauce.

This should be the correct color of your chicken which was fried
chicken fried bits


Step 2: Orange Chicken Sauce: Keep these ingredients together 1 ½ teacup of water, soy sauce, vinegar, ginger-garlic paste, orange juice and lemon juice. Put all together in a pan except the orange juice and lemon juice. Keep the rest of the ingredients to a boil before you add the orange juice and the lemon juice. After 5 minutes you can now add your brown sugar. I just put ¾ cups of brown sugar here, but if that is too much for your taste, you can just use tablespoons of sugar and taste the mixture so that you can determine the consistency that you wanted.

Once the taste is okay for you, you can now add cornstarch in water and mix it along with the sauce to make it thicker. You can now add the fried chicken bits until the water drains and leave it saucy or gravy looking. Sprinkle it with fresh spring onions for garnishing.

Sweet, Sour and Spicy Orange Chicken that you will love!
orangechicken2


I just put those sliced oranges for the decoration, but if you want to serve it in the table just like that, go ahead, by all means you can do it. In cooking Orange Chicken, most would use readymade orange juice in can or packs. But for me, I did use 1 whole freshly squeezed orange to make this recipe even more delicious. I do hope you like it and try it also at home and make your husband and kids happy.

Thursday, July 7, 2011

Easy Sweet Bukayo

Nothing is too sweaty to make this sweet treat. I myself decided that it’s been years since I haven’t tried eating bukayo. Bukayo is a native sweet in the Philippines which is made from shreds of coconut flesh and you cook it along with brown sugar or panutsa (jaggery in Hindi).

A treat for the Sweet Tooth, Bukayo!
bukayo2


I have left over buko so I decided to make bukayo. Most bukayo that were being sold in the market are from hard fleshed old stocked coconuts making bukayo harder for you to chew. Unlike the one I have prepared, it was just soft and tender flesh of buko.

What I did was just include 2 drops of vanilla extract, 2 tablespoons of all-purpose cream, brown sugar and ¼ tea cups of water. Just cook the buko pieces along with the ingredients and wait for it to drain the water. The brown sugar will tend to become stiff so make sure you always stir what you are cooking and keep the flame in slow to medium heat only so that you will not burn the sugar and stick at the bottom of the pan.

It will become harder once it cools down. But if it was still hot, it will still be gooey like glue. The taste is really awesome and it was so addictive since the flesh of buko is tender, you will be enjoying chewing it without difficulty.

Stick together team!yummy
bukayo1


I treat it more than a candy since it’s not hard to munch and I also like its consistency. You can cut it into smaller pieces if you like, but for me, that size I showed on the picture was enough since it’s not the commercialized bukayo that was grated into smaller sizes. So if you have buko at home and you want to make it more interesting to eat, why not try to make easy sweet bukayo out of it. It will only take 2 minutes to prepare and cook and kids will surely enjoy this treat.

Wednesday, July 6, 2011

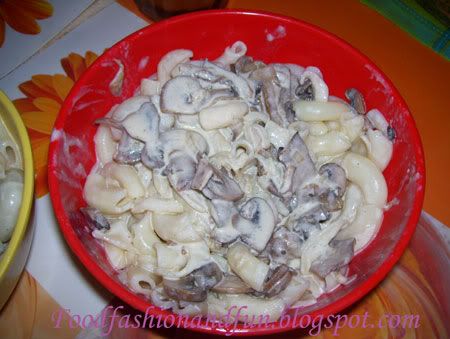
Macaroni Carbonara ala Pobre

You can’t resist carbonara because of its creaminess. I have to make it simpler this time because first of all I don’t have fettuccine pasta, second I cannot include bacon in this dish since we don’t eat pork meat. I am sure you would say, ohhh no! a carbonara will never be carbonara without the taste of bacon. Well, that is true because that is how carbonara should be made. But for those who don’t eat pork, well this recipe is for you since I only improvised chicken instead of bacon.


Photobucket


You might also think that why not use pasta such as spaghetti or fettuccine? Well, as I have said, nothing on hand that is available except macaroni so my version for today was Macaroni Carbonara ala Pobre. I used only cheddar cheese because it’s too expensive to buy parmesan cheese here. Maybe if I do have an extra budget for that, I can boost some more for my ingredients. Sometimes, we just don’t need to follow what’s on the cookbook. We need to innovate at times and if you’re bold to do things and experiment, you might be able to invent something special and something that tastes good even if the ingredients are not the actual things you added.

So I sliced off those button mushrooms, readied my sauce and other ingredients to make this especial dish. It was perfect for brunch as what I prepared before hubby goes to work. It was already heavy in the tummy and I just wish I had garlic bread to go well with this recipe. Anyway going back to what I am drawing here, you just needed these few ingredients to make macaroni carbonara ala pobre inviting:

Ingredients:

Macaroni (elbow)
Button mushrooms
Garlic
Onion
Maggi ginisa flavor mix
Chicken bouillon cube
All-purpose cream
Cheddar cheese
Salt
Ground black pepper
Water
Cooking oil

Preparation / Method on cooking Macaroni Carbonara ala Pobre:


Photobucket


Step 1: Boil the macaroni: Just follow the instruction on how long your macaroni will be ready. It usually takes about 8-12 minutes of cooking, it also depends on the brand so be sure to read the label. Once your macaroni is done, set it aside.

Step 2: For your carbonara sauce, this is what you need to do:
Sauté garlic and onion on a pan with oil and put the button mushrooms. While you stir you can now add your ginisa flavor mix and chicken bouillon cube to add flavor to your mushroom. This is the signature that will keep your mushroom tasty.

Step 3: You need to get ready your all-purpose cream. If it’s too thick, just add ample amount of water and just add salt and ground black pepper to taste. Stir well so that it won’t stick at the bottom of the pan. Make sure that your flame is in medium to slow heat. Once your sauce is done, it will be ready to mix with your macaroni. Best to serve with garlic bread and I do hope you will also try this simple yet affordable recipe.

Subscribe via email