Friday, September 30, 2011
Crab Sticks for Dinner
I was lazy to cook a menu when I do have chicken and beef inside the fridge. I just preheat the leftover food which was beef curry and I just fried some crab sticks with chicken salami and put the remaining potato salad as side dish and some sliced melon fruit, TADA! Instant dinner for me!
Crab sticks with Chicken Salami
I do have a lot of article writings to do and I was really on the go so I don’t want to lose my concentration. By the way this crab stick comes handy because I also include it on my other vegetable dishes especially when it is only for sautéing.
Crab stick is also perfect for fried rice by just simply put garlic, onions, salt and some special seasonings for your leftover rice and add some egg and fried crab sticks along with carrot and some peas. You can also add crab sticks on your favorite garden toss salad.
Easy to prepare dinner!
I do like a quickie recipe which I remember how exciting Nigella cooks sometimes when she incorporates simple dishes resulting into a fabulous one. Well pardon for my purely veggie friends who will definitely skip on these recipe. I do hope that next time I will be able to post some veggie recipes for you because for now, I still don’t have the time to go out and buy ingredients. But I will be happy if you can also post a comment and ask me for recipes that you would like me to post and share here. Happy eating!
Labels:
fried crab sticks
Thursday, September 29, 2011
A Piece of Chocolate Almond Cake
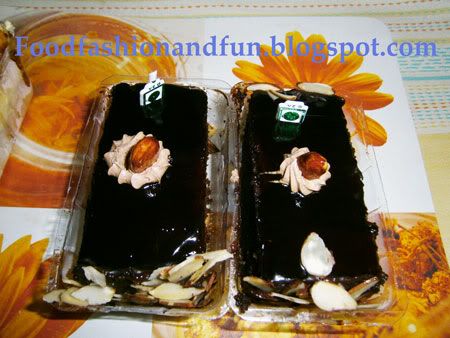
Happy Birthday My Dear husband! This year we don’t want to be extravagant in celebrating birthdays due to the fact that we need to save some money for our upcoming baby as I will also ready myself to give birth to our first born. Well, a simple cake is the witness to this, well this time it’s a piece of choco- almond cake.
You want a piece of me?
If you can see on the picture, it was labeled VEG, in short for vegetarian or a cake which vegetarians can consume. It is eggless but for me it was just the same although the texture will be the difference. I didn’t enjoy much of the taste of sliced almonds on top and on the side, but I really did compliment on the moist chocolate flavor.
It's A piece of cake!!!
I did cook some pasta spaghetti at that time and hubby also bought home Butterscotch ice cream, and that was it, birthday was complete. What was important was that God granted him another good year, life which is protected by God and good health.
I just can’t help sometimes to think of ways I can do to earn and save more so that by next time, I will be presenting a big gift box wrapped just for him, for now, I didn’t have any birthday presents, so dry but anyway, it’s not only one time, someday I can also be contributing a lot…sigh! This year was just the driest of my entire online income stream; hope to get myself back for good offers as I keep my fingers crossed. Have some cake anyone!
If you can see on the picture, it was labeled VEG, in short for vegetarian or a cake which vegetarians can consume. It is eggless but for me it was just the same although the texture will be the difference. I didn’t enjoy much of the taste of sliced almonds on top and on the side, but I really did compliment on the moist chocolate flavor.
I did cook some pasta spaghetti at that time and hubby also bought home Butterscotch ice cream, and that was it, birthday was complete. What was important was that God granted him another good year, life which is protected by God and good health.
I just can’t help sometimes to think of ways I can do to earn and save more so that by next time, I will be presenting a big gift box wrapped just for him, for now, I didn’t have any birthday presents, so dry but anyway, it’s not only one time, someday I can also be contributing a lot…sigh! This year was just the driest of my entire online income stream; hope to get myself back for good offers as I keep my fingers crossed. Have some cake anyone!
Labels:
chocolate cake,
eggless-cakes
Wednesday, September 28, 2011
Mutton Kebab and Beef Rolls
It was Sunday night and I didn’t know that hubby ordered this outside even if I just prepared beef soup at that time. Well anyway, after a day of cleaning and dusting off, we got tired and having this meal is surely another exquisite taste of what was offered on the streets of Mumbai.
Try these delicious foods! Kebab and rolls
Kebab is a famous food known in the Mediterranean and Middle East and vast spread the country like India and its neighboring countries. It has a lot of varieties and flavors for the mouth to try. But this time, what we have was mutton kebab and beef rolls. Mutton kebab can never be complete without eating it along with some sliced onions and dipping it into masala or chutney or some pickles.
Mutton Kebab and Beef Rolls
I do like the way they also prepared the beef rolls. It is good to combine with hot rice or chapatti. I also like how they did cook the kebab because it wasn’t charred like what others prepare it. The combination of hot, spicy and salty flavor of the kebab makes customers coming back for more.
Hope to try these kinds of recipe once we have a good grill machine and oven and I am sure I’d be sharing it here on my blog. So if you are to try some cuisines from the Mideast and Indian dish, this kebab and beef roll is a sure must try for you to order. You will never regret it once you have tasted it, ahem of course not unless if you are 100% vegetarian, you will be skipping this.
Kebab is a famous food known in the Mediterranean and Middle East and vast spread the country like India and its neighboring countries. It has a lot of varieties and flavors for the mouth to try. But this time, what we have was mutton kebab and beef rolls. Mutton kebab can never be complete without eating it along with some sliced onions and dipping it into masala or chutney or some pickles.
I do like the way they also prepared the beef rolls. It is good to combine with hot rice or chapatti. I also like how they did cook the kebab because it wasn’t charred like what others prepare it. The combination of hot, spicy and salty flavor of the kebab makes customers coming back for more.
Hope to try these kinds of recipe once we have a good grill machine and oven and I am sure I’d be sharing it here on my blog. So if you are to try some cuisines from the Mideast and Indian dish, this kebab and beef roll is a sure must try for you to order. You will never regret it once you have tasted it, ahem of course not unless if you are 100% vegetarian, you will be skipping this.
Saturday, September 24, 2011
Mutton Curry
Four days or more, who knows when our gas tank will be delivered (sigh!) It is really frustrating to tell you guys that we still don’t have a spare tank to keep so it is still a nightmare for me whenever we ran out of gas cylinder.
Mutton Curry, Rich in Gravy!
Anyway, what we usually do when this crisis happen is to order food from the nearest food restaurant and for now, what I have was mutton curry. Mutton meat is healthy and is more buttery in taste than other red meat. It has a lot of nutrients available and I can say that it is tenderer than cow’s meat. I do like the taste of mutton curry because of its gravy. This time it is hot and spicy, well of course not according to my own palate but based on Indians own liking, which is spicier and hot.
Red orange in color, this is how hot it looks like!
Whenever they serve curry such as this, they will always include a pickle, be it a mango or lemon. It will also have sliced onions to match that pickle. This time what I have in my plate was a lemon pickle. The gravy or sauce wasn’t salty enough but eating it with the pickled lemon perfectly matches the dish. I also like how the smell of mutton curry was. I just can’t explain it but it was really savory and buttery.
Mutton Curry For my Lunch!
You can enjoy eating mutton curry with chapatti (flat bread) of India or hot rice. It is also good to pair it with papad or anything fried. Bon Appetit!
Anyway, what we usually do when this crisis happen is to order food from the nearest food restaurant and for now, what I have was mutton curry. Mutton meat is healthy and is more buttery in taste than other red meat. It has a lot of nutrients available and I can say that it is tenderer than cow’s meat. I do like the taste of mutton curry because of its gravy. This time it is hot and spicy, well of course not according to my own palate but based on Indians own liking, which is spicier and hot.
Whenever they serve curry such as this, they will always include a pickle, be it a mango or lemon. It will also have sliced onions to match that pickle. This time what I have in my plate was a lemon pickle. The gravy or sauce wasn’t salty enough but eating it with the pickled lemon perfectly matches the dish. I also like how the smell of mutton curry was. I just can’t explain it but it was really savory and buttery.
You can enjoy eating mutton curry with chapatti (flat bread) of India or hot rice. It is also good to pair it with papad or anything fried. Bon Appetit!
Thursday, September 22, 2011
Ginataang Halo-Halo
Ginata means with coconut milk while Halo-halo means a mixture. This is a famous snack or meryenda in my country Philippines. I really do miss this recipe so I have decided why not try it at home especially hubby’s birthday is just around the corner and I can still gather some of the ingredients here in India although I failed searching for jackfruit and gluten rice. Last two months ago jackfruit was in season and it’s been available in the street and in grocery, but at this point in time, I haven’t seen any, probably the season was over so no vendor is selling it here.
Ginataang Halo-halo anyone?

About the gluten rice, well they really don’t have sticky rice so what I did to compensate the remaining ingredient is to get rice flour. I did some testing first before I put it in coconut milk. I did put the bilo-bilo in the boiling water and this was good to remove the floury taste. The rest of the root crop is available in India year round like the sweet potato, taro root and the yam. Although in Philippines, we have purple yams which are attractive to look at when you cook. But here in India, they only have the yellow variety so my yam looks a lot like sweet potato.
By the way the tapioca or pearl balls, I got that in my country, I haven’t seen it here in India or where to buy it. About the coconut milk, well I have used two bowls full so that it can be enough for my recipe. Here are the ingredients needed for Ginataang Halo-halo:
Yam (ube) – ¼ kilo
Taro(gabi)- 4 small pieces
Sweet potato- 2 big pieces
Plantain(saba)- 6-8 pieces
Coconut milk- (6-7 cups)
Sugar (2 cups)
Tapioca- (1/4 cup)
Jackfruit-(1/4 kilo)
Bilo-bilo (gluten rice) / or you can also use rice flour
Pandan(screw pine)- optional
Some of the ingredients for Ginataang Halo-halo
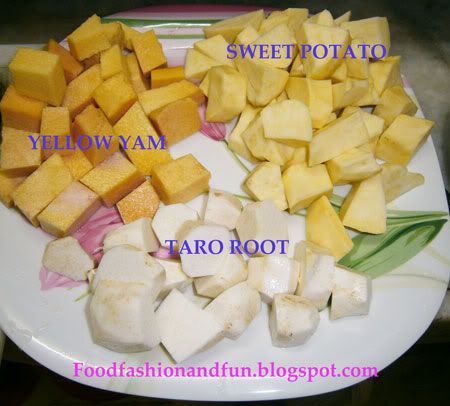
Procedure / Methods of Cooking and Preparing Ginataang Halo-halo:
For Bilo-bilo:
I just made 20 pieces and this depends on you. Since I just used rice flour which is not that appealing to my own taste since there was no sticky rice (gluten) available, what you need to do here is to put ample amount of water in your rice flour and make small balls and boil water. Wait for the boiling point before you place the bilo-bilo. You need to wait 5-8 minutes and set this aside before placing it in the coconut milk later.
Bilo-bilo, better if it was the sticky rice (galapong)

For Tapioca / Pearl Balls: Soak in water for 15 to 20 minutes first. After this boil water and put the tapioca balls. Once you see it’s soft and tender, keep it aside for the next step of cooking.
Tapioca or Pearl balls with Banana Plantain

Step 1: Boil half cup water and put one bowl of coconut milk and pandan (if you have). After two minutes, you have to put the yam first, then after 6 minutes, you can now add the sweet potato and taro root and add the cup of sugar. Stir gently and wait for the root crops to get soft before putting the next ingredients which is your bilo-bilo, plantain and tapioca. If you have jackfruit, you can include it with these three.
Miss eating Ginataang Halo-halo, and now I can enjoy!

Step 2: Before putting the last three ingredients, add the remaining bowl of coconut milk. This will help get it creamier and just taste it if you still need to add more sugar into your Ginataan. Usually, this recipe will be ready in 30-40 minutes, depending on you. For me, I keep it in slow flame on the last 15 minutes of cooking it, the first part of cooking I put it into high and medium flame.
Much better if I was able to find jackfruit

Ginataang Halo-halo is usually served as a snack or meryenda. It can also be served hot or cold depending on your preference.

About the gluten rice, well they really don’t have sticky rice so what I did to compensate the remaining ingredient is to get rice flour. I did some testing first before I put it in coconut milk. I did put the bilo-bilo in the boiling water and this was good to remove the floury taste. The rest of the root crop is available in India year round like the sweet potato, taro root and the yam. Although in Philippines, we have purple yams which are attractive to look at when you cook. But here in India, they only have the yellow variety so my yam looks a lot like sweet potato.
By the way the tapioca or pearl balls, I got that in my country, I haven’t seen it here in India or where to buy it. About the coconut milk, well I have used two bowls full so that it can be enough for my recipe. Here are the ingredients needed for Ginataang Halo-halo:
Yam (ube) – ¼ kilo
Taro(gabi)- 4 small pieces
Sweet potato- 2 big pieces
Plantain(saba)- 6-8 pieces
Coconut milk- (6-7 cups)
Sugar (2 cups)
Tapioca- (1/4 cup)
Jackfruit-(1/4 kilo)
Bilo-bilo (gluten rice) / or you can also use rice flour
Pandan(screw pine)- optional
Procedure / Methods of Cooking and Preparing Ginataang Halo-halo:
For Bilo-bilo:
I just made 20 pieces and this depends on you. Since I just used rice flour which is not that appealing to my own taste since there was no sticky rice (gluten) available, what you need to do here is to put ample amount of water in your rice flour and make small balls and boil water. Wait for the boiling point before you place the bilo-bilo. You need to wait 5-8 minutes and set this aside before placing it in the coconut milk later.
For Tapioca / Pearl Balls: Soak in water for 15 to 20 minutes first. After this boil water and put the tapioca balls. Once you see it’s soft and tender, keep it aside for the next step of cooking.
Step 1: Boil half cup water and put one bowl of coconut milk and pandan (if you have). After two minutes, you have to put the yam first, then after 6 minutes, you can now add the sweet potato and taro root and add the cup of sugar. Stir gently and wait for the root crops to get soft before putting the next ingredients which is your bilo-bilo, plantain and tapioca. If you have jackfruit, you can include it with these three.
Step 2: Before putting the last three ingredients, add the remaining bowl of coconut milk. This will help get it creamier and just taste it if you still need to add more sugar into your Ginataan. Usually, this recipe will be ready in 30-40 minutes, depending on you. For me, I keep it in slow flame on the last 15 minutes of cooking it, the first part of cooking I put it into high and medium flame.
Ginataang Halo-halo is usually served as a snack or meryenda. It can also be served hot or cold depending on your preference.

Labels:
ginataan
Wednesday, September 21, 2011
Fried Spicy Squid
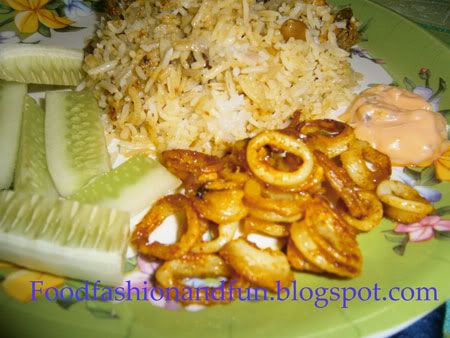
It’s not what you think it is, this is not the famous calamari where it is coated with egg, flour and some seasonings. What I did was just marinating it with turmeric, salt and chili powder before frying. I haven’t written something about it when I checked my blog so I just posted it now, even though I always cook it at home.
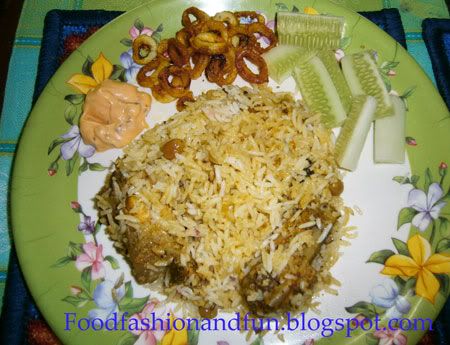
Crispy Fried Squid with Chicken Biryani, Cucumber and Thousand Island Dressing
Now, if you may say this one is really frying because it is also popping. Be careful when frying squid, it will spatter hot oil on your skin so be prepared to use a lid or cover whenever you fry. The reason why is that the squid takes off liquid and second is that it does not have any flour coating so the tendency when you cook it in hot oil, the oil itself spills on the side of the lid sliding the liquid along with the oil.
Anyway, if you haven’t tried this recipe, you should, it is tasty and there is a good amount of hotness or chill in the tongue because of the chili powder. Just put the flame from medium to slow. You don’t need a high flame just to cook the squid well. It is much better if you dry the squid first by letting the liquid out and once it dried, put the oil and be sure the flame is in slow only. It will be cooked equally as long as you turn the other side around.
Marinated with turmeric, salt and chili powder
It just so happen that I was having my chicken biryani when I cooked the squid and I put a little dressing like Thousand Islands for my crunchy cucumber. It was fantastic and I really love the crispiness of the squid rings.
My Lovely Dinner! I like how crispy the fried squid was
By the way before I forgot, the squid was cleaned off of its ink sac and cuttlebone (plastic looking) inside the squid. So cut it into rings and wash it thoroughly before marinating it with the ingredients I mentioned above.
Now, if you may say this one is really frying because it is also popping. Be careful when frying squid, it will spatter hot oil on your skin so be prepared to use a lid or cover whenever you fry. The reason why is that the squid takes off liquid and second is that it does not have any flour coating so the tendency when you cook it in hot oil, the oil itself spills on the side of the lid sliding the liquid along with the oil.
Anyway, if you haven’t tried this recipe, you should, it is tasty and there is a good amount of hotness or chill in the tongue because of the chili powder. Just put the flame from medium to slow. You don’t need a high flame just to cook the squid well. It is much better if you dry the squid first by letting the liquid out and once it dried, put the oil and be sure the flame is in slow only. It will be cooked equally as long as you turn the other side around.
It just so happen that I was having my chicken biryani when I cooked the squid and I put a little dressing like Thousand Islands for my crunchy cucumber. It was fantastic and I really love the crispiness of the squid rings.
By the way before I forgot, the squid was cleaned off of its ink sac and cuttlebone (plastic looking) inside the squid. So cut it into rings and wash it thoroughly before marinating it with the ingredients I mentioned above.
Tuesday, September 20, 2011
Homemade Spanish Sardines Recipe
Hubby bought fresh sardines yesterday and I thought he just wanted me to fry it. I was surprised to hear that he wants me to prepare Spanish sardines which he viewed online while I was seated and updating my blog. He thought that I already knew how to prepare one, but I said, well this will be my very first to try since most of the articles posted with regards to making Spanish sardines are just the same and I wonder why it was just copy pasted and where is the copyright there.
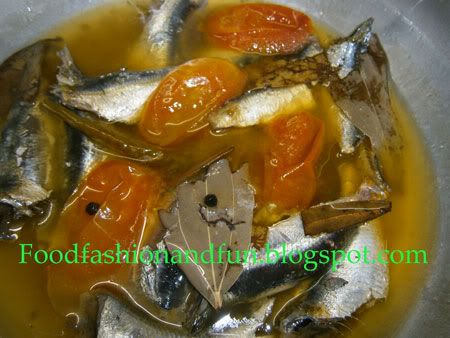
Fresh sardines as we prepare it for cooking
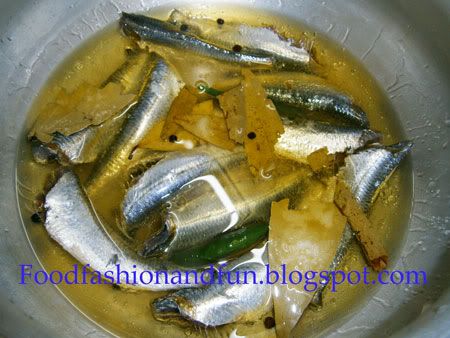
But anyway, none of my business I am just here to tell you that I didn’t even follow what was given online. First of all, my ingredients wasn’t complete like pickle relish and carrot, instead what I just included on my homemade recipe for Spanish sardine was tomato, whole black peppercorns, bay leaves, green chili, olive oil,cinnamon stick, salt to taste, water and fresh sardines.
It was so simple to do and prepare. Just gather the ingredients first like what I have mentioned above and put it in a pressure cooker. Now this one is the trick, I don’t know what type of pressure cooker you have, but in India, they have the best pressure cooker and what when it whistles, that’s the right counting you need to remember, unlike other pressure cookers that keeps on whistling like a train and you need to set a timer on it.
We added tomatoes into it to have some color since we don't have carrot
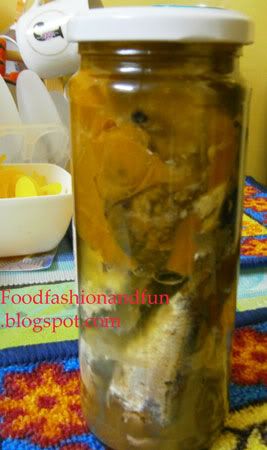
Anyway, I just prepared the sardines and cook it in 15-18 minutes and it was all done and the bones were soft. After we cool down the sardines, we placed it in a bottle where we can store. The taste was just superb and you can obviously smell what was cooking in the kitchen when the pressure cooker started to whistle and call your attention.
Let it cool down before placing in the bottle
Take note, I did not say put the sardines in the bottle and place it inside the pressure cooker that is INCREDIBLY INSANE because that glass bottle will definitely explode. Just what I have read on someone else’s article, duhh! Never ever do that death defying stunt in your kitchen and in your very own home.
By the way, if you ask me how much fresh sardines are needed, well what I just prepared was ½ kilo and this was enough to fill our long slim glass bottle. Again, if we talk about sardines, you need to exclude the tail and heads so clean it properly before putting the other ingredients in.
But anyway, none of my business I am just here to tell you that I didn’t even follow what was given online. First of all, my ingredients wasn’t complete like pickle relish and carrot, instead what I just included on my homemade recipe for Spanish sardine was tomato, whole black peppercorns, bay leaves, green chili, olive oil,cinnamon stick, salt to taste, water and fresh sardines.
It was so simple to do and prepare. Just gather the ingredients first like what I have mentioned above and put it in a pressure cooker. Now this one is the trick, I don’t know what type of pressure cooker you have, but in India, they have the best pressure cooker and what when it whistles, that’s the right counting you need to remember, unlike other pressure cookers that keeps on whistling like a train and you need to set a timer on it.
Anyway, I just prepared the sardines and cook it in 15-18 minutes and it was all done and the bones were soft. After we cool down the sardines, we placed it in a bottle where we can store. The taste was just superb and you can obviously smell what was cooking in the kitchen when the pressure cooker started to whistle and call your attention.
Take note, I did not say put the sardines in the bottle and place it inside the pressure cooker that is INCREDIBLY INSANE because that glass bottle will definitely explode. Just what I have read on someone else’s article, duhh! Never ever do that death defying stunt in your kitchen and in your very own home.
By the way, if you ask me how much fresh sardines are needed, well what I just prepared was ½ kilo and this was enough to fill our long slim glass bottle. Again, if we talk about sardines, you need to exclude the tail and heads so clean it properly before putting the other ingredients in.
Labels:
homemade recipe,
sardines
Monday, September 19, 2011
Samosa
This was the samosa I was talking you about. It is a stuffed pastry snack which is popular in India. There are different versions on how people cook it but definitely you can only be assured that potatoes and green peas will always be included inside a veggie samosa.
Crunchy and tasty veggie samosa
This type of samosa is what we usually buy near our place. Every time we buy a samosa, they will give us a spicy chili sauce, fried green chili and a combination of this orange colored crusted crumb which is a combination of spices, crumbs and dried coconut shreds.
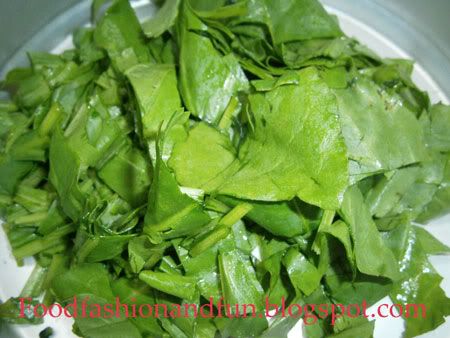
Samosa, a favorite snack here in India
Some samosas are with chutneys for sauce. But what I like in the way they prepare this samosa is that it wasn’t that oily. Most of the samosa we order inside the train while traveling was really oily and I don’t like their preparations. You can only enjoy samosa when it is hot and newly cooked because if it is cold, it will not be that crunchy but mushy to the bite.
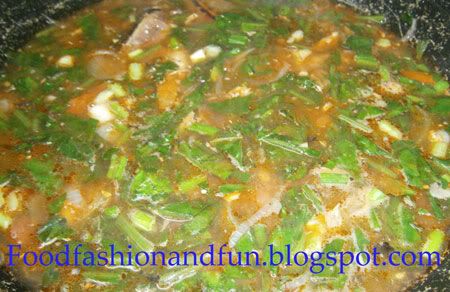
Just expect that samosas will be hot to the taste, but not all since they prepare it in different ways. Samosas are triangular in shape and they are somewhat related to stuffed crusted snack we call empanada.
Samosas are deeply fried in oil to cook it well. I have also tasted some non vegetarian samosas in Goa and they are one of the best alternative. I did enjoy eating shrimp samosa and beef samosa, yummy and delicious as what my mouth can say. Wish that someday soon I will be able to make my own home made samosa.
This type of samosa is what we usually buy near our place. Every time we buy a samosa, they will give us a spicy chili sauce, fried green chili and a combination of this orange colored crusted crumb which is a combination of spices, crumbs and dried coconut shreds.
Some samosas are with chutneys for sauce. But what I like in the way they prepare this samosa is that it wasn’t that oily. Most of the samosa we order inside the train while traveling was really oily and I don’t like their preparations. You can only enjoy samosa when it is hot and newly cooked because if it is cold, it will not be that crunchy but mushy to the bite.
Just expect that samosas will be hot to the taste, but not all since they prepare it in different ways. Samosas are triangular in shape and they are somewhat related to stuffed crusted snack we call empanada.
Samosas are deeply fried in oil to cook it well. I have also tasted some non vegetarian samosas in Goa and they are one of the best alternative. I did enjoy eating shrimp samosa and beef samosa, yummy and delicious as what my mouth can say. Wish that someday soon I will be able to make my own home made samosa.
Sunday, September 18, 2011
Creamy Chicken Penne Pasta
The disadvantage of buying an item which is big in size and the type of tetra was just cut to open without resealable cap pushes me to use all that is inside the pack. There was no smaller size of tetra pack so the tendency is that I need to use it within 4-5 days after opening and that is why most of the recipes I will be posting will be with cream.
Creamy Chicken Penne
Yesterday I made a creamy potato salad and now, what I have prepared was creamy chicken penne pasta which looks like a casserole but I haven’t baked it. But if you like, there is nothing wrong as long as you put cheese into it.
Ran out of cheese this time
This recipe is just easy to prepare and you just need to combine the pasta into the creamy sauce that you are cooking. So without further delay here are the ingredients needed for your Creamy Chicken Penne Pasta.
Ingredients
Boneless chicken
Spinach
Penne pasta
Egg
Fresh Milk
All Purpose cream
Tomato
Garlic
Onion
Cheese
Salt
Procedure/ Methods on how to cook Creamy Chicken Penne Pasta
Step 1: Cut the boneless chicken into cubes and put salt. In a pan put the cut chicken pieces and wait till the water drains before you put oil. Once the chicken turns light brown you can now sauté it with chopped garlic and onions.
Boiling the pasta:
Boil water and put the penne pasta. Follow the instruction in the label and drain the pasta and wash it off with cold water and drain it again and set aside.
For the Creamy Sauce: Combine 1 egg, 1 cup of fresh milk, ¾ cup of all purpose cream, salt and grated cheddar cheese.
Step 2: Next step is to put the spinach, wait till the water drains before putting the boiled penne pasta and pouring the creamy sauce into it. Last step is putting the chopped tomatoes. This is just to give color to your pasta dish so don’t overcook. You just need to cook it for a minute and season it with salt if you think you need more taste.
Yesterday I made a creamy potato salad and now, what I have prepared was creamy chicken penne pasta which looks like a casserole but I haven’t baked it. But if you like, there is nothing wrong as long as you put cheese into it.
This recipe is just easy to prepare and you just need to combine the pasta into the creamy sauce that you are cooking. So without further delay here are the ingredients needed for your Creamy Chicken Penne Pasta.
Ingredients
Boneless chicken
Spinach
Penne pasta
Egg
Fresh Milk
All Purpose cream
Tomato
Garlic
Onion
Cheese
Salt
Procedure/ Methods on how to cook Creamy Chicken Penne Pasta
Step 1: Cut the boneless chicken into cubes and put salt. In a pan put the cut chicken pieces and wait till the water drains before you put oil. Once the chicken turns light brown you can now sauté it with chopped garlic and onions.
Boiling the pasta:
Boil water and put the penne pasta. Follow the instruction in the label and drain the pasta and wash it off with cold water and drain it again and set aside.
For the Creamy Sauce: Combine 1 egg, 1 cup of fresh milk, ¾ cup of all purpose cream, salt and grated cheddar cheese.
Step 2: Next step is to put the spinach, wait till the water drains before putting the boiled penne pasta and pouring the creamy sauce into it. Last step is putting the chopped tomatoes. This is just to give color to your pasta dish so don’t overcook. You just need to cook it for a minute and season it with salt if you think you need more taste.
Labels:
chicken,
penne pasta
Saturday, September 17, 2011
Creamiest Potato Salad
Macaroni salad is over, now let’s try potato salad. This is still the continuation of my creamy series where I needed to finish up that all purpose cream that I have inside the fridge. Actually this recipe I have twisted a bit since I don’t have other ingredients like mayo, mustard paste and sweet pickle relish so what I did to improvised for the missing ingredient was to use Thousand Island dressing which has sweet pickle relish into it and I didn’t regret it, the taste was just superb.
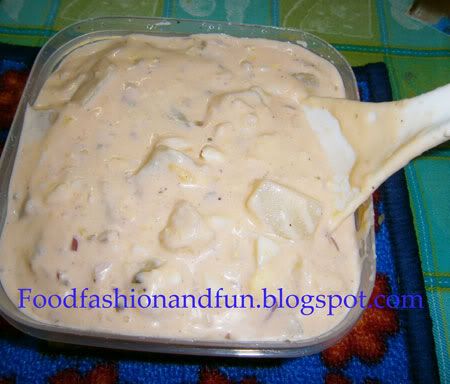
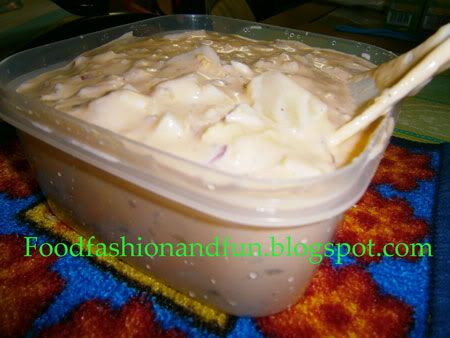
Don't blame me, it's really creamy the way I want it!
It is just easy to prepare just boil the potatoes and cut them into bigger chunks and don’t overcook those potatoes because you are not preparing mash potatoes but a salad and you need to stir other ingredient into it so be extra careful not to crush the potatoes. I am sure it won’t be if you have cooked the potatoes right.
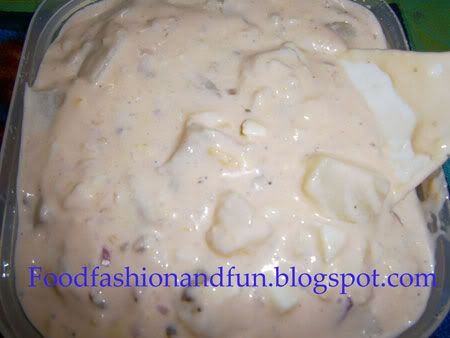
Sorry folks the cream really covered the ingredients obviously!
I was able to make 2 bowls full for 4 medium sized potatoes
Here are some ingredients you may need for the salad:
4 medium sized potatoes (boiled and sliced into bigger chunks)
Onions (chopped into bits)
Thousand island dressing (just in case you don’t have mayo, pickle relish and mustard sauce)
All purpose cream
4 eggs (hard boiled)
Sweetened milk
Salt and pepper
4 medium sized potatoes can serve 20+ people
Mix all the said ingredients above. If you have noticed I didn’t put any amount of measurements since you will be the one to measure it according to your liking. These 4 medium potatoes gave me two big bowls full which is good to serve 20 plus people. I just used one and a half cup of all purpose cream, ¾ cup of sweetened milk, half cup of Thousand Island dressing.
About the egg, you just need to mash the egg yolk and slice the egg whites into smaller bits and pour it into the mixture together with the chopped onions. Just season your salad with salt and ground black pepper and put inside the fridge. Some would include vinegar into their dressing, but as for me the Thousand Island dressing is perfect so I did not include any vinegar. You can include some cayenne or paprika for coloring only and some flavor but at this preparation, I did not include any. Enjoy your salad with buttered bread or side dish it with your favorite fried chicken.
It is just easy to prepare just boil the potatoes and cut them into bigger chunks and don’t overcook those potatoes because you are not preparing mash potatoes but a salad and you need to stir other ingredient into it so be extra careful not to crush the potatoes. I am sure it won’t be if you have cooked the potatoes right.
Here are some ingredients you may need for the salad:
4 medium sized potatoes (boiled and sliced into bigger chunks)
Onions (chopped into bits)
Thousand island dressing (just in case you don’t have mayo, pickle relish and mustard sauce)
All purpose cream
4 eggs (hard boiled)
Sweetened milk
Salt and pepper
Mix all the said ingredients above. If you have noticed I didn’t put any amount of measurements since you will be the one to measure it according to your liking. These 4 medium potatoes gave me two big bowls full which is good to serve 20 plus people. I just used one and a half cup of all purpose cream, ¾ cup of sweetened milk, half cup of Thousand Island dressing.
About the egg, you just need to mash the egg yolk and slice the egg whites into smaller bits and pour it into the mixture together with the chopped onions. Just season your salad with salt and ground black pepper and put inside the fridge. Some would include vinegar into their dressing, but as for me the Thousand Island dressing is perfect so I did not include any vinegar. You can include some cayenne or paprika for coloring only and some flavor but at this preparation, I did not include any. Enjoy your salad with buttered bread or side dish it with your favorite fried chicken.
Friday, September 16, 2011
Going Bananas
Lazy day today as I wasn’t that productive when it comes to searching for new exciting recipes to prepare. Must be the hormones and I am feeling heavier and heavier as days go by. Why? Aahh due to pregnancy and my stomach gets smaller as baby gets bigger inside. I need to eat in small portions because I can feel so full easily and if I do eat in smaller portions, I do need to eat after 30 minutes again.
Salted banana chips
banana chips I paired with macaroni salad, food tripping!
I would like to munch banana chips and combine it with something sweet because the one I bought in the store was so salty and to fight the salty taste I was eating the macaroni salad that I made days ago. Hubby is not into sweets so I was really struggling to finish this salad. I just don’t eat that daily and wishing that baby would be just enough for me to take a normal delivery.
My weight added another pound for this week but at least my doctor tells me that my weight is still ideal and nothing to worry about. I just need regular exercise and well, what I can just do with that is a brisk walk in the afternoon where I needed to go out and buy something to eat or prepare for dinner.
Are you also moody at times and have food cravings like crazy? Well, somebody would say that I really have a strange food combination for today, well good thing it does not happen every day and it wasn’t a crave this time.
Labels:
banana chips
Thursday, September 15, 2011
Sautéed Spinach in Sardines
Another exciting day to start and this recipe is a stellar because I haven’t eaten sardines (in can) for so long. Why? It’s because sardines (in can) here in India are gold in price. They are mostly imported from other countries and most Indians do prefer to eat fresh sardines rather than in can. So I also guess that most of the locals don’t even know sardines are canned.
Precious sardines, at last I have tasted you!
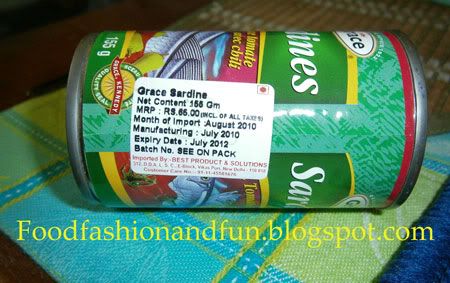
The golden price of sardines in can
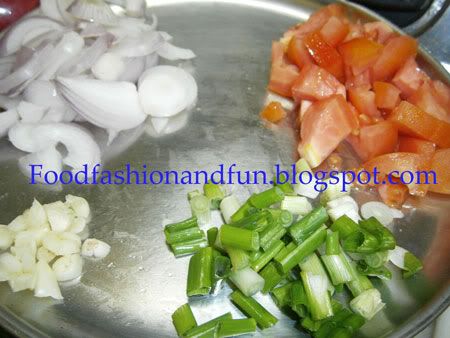
Anyway, this recipe is just so easily to cook. All you need is garlic, onions, spring onions and tomato. For seasoning, you need to use soya sauce, salt and ground black pepper. In a pan, heat up the oil for sautéing garlic, onions and tomatoes. After this you need to put the sardines and put two tablespoons of soya sauce.
Ingredients you need for this recipe
Fresh and Green Spinach
After that, you can now put the spinach. Add water suited to your liking as you flavor it with salt and ground black pepper. This would not take too long because spinach is easy to cook so two to three minutes of cooking the spinach is okay. I do miss pechay but since it is not available here in India, spinach is the next best thing to include.
Tada!! Sauteed Spinach in Sardines
The taste of the sardine was great, it has a bit of spice and the sardine was not so mushy unlike any other local sardine in can. Anyway the price speaks for itself; it costs Rs66.00 or equivalent to $1.50 for that 155 grams. You might have screamed already, yeah I know because in the Philippines, one can of local sardine just cost around P 18-20+ pesos or equivalent to $.047 cents, see big the difference? But anyway, hubby and I enjoyed eating our sautéed spinach in sardines.
Anyway, this recipe is just so easily to cook. All you need is garlic, onions, spring onions and tomato. For seasoning, you need to use soya sauce, salt and ground black pepper. In a pan, heat up the oil for sautéing garlic, onions and tomatoes. After this you need to put the sardines and put two tablespoons of soya sauce.
After that, you can now put the spinach. Add water suited to your liking as you flavor it with salt and ground black pepper. This would not take too long because spinach is easy to cook so two to three minutes of cooking the spinach is okay. I do miss pechay but since it is not available here in India, spinach is the next best thing to include.
The taste of the sardine was great, it has a bit of spice and the sardine was not so mushy unlike any other local sardine in can. Anyway the price speaks for itself; it costs Rs66.00 or equivalent to $1.50 for that 155 grams. You might have screamed already, yeah I know because in the Philippines, one can of local sardine just cost around P 18-20+ pesos or equivalent to $.047 cents, see big the difference? But anyway, hubby and I enjoyed eating our sautéed spinach in sardines.
Wednesday, September 14, 2011
What’s with Okra?
I know some of you don’t eat okra, not because it’s gooey and yucky and impersonates your saliva, but because you are not used of eating it. Parents would insist their kids to eat veggies because it is good for health. I used to remember my mother who gives us a story about veggies to convince us to eat it. In fact, it was successful because no matter how I don’t like some veggies, later on after convincing us about that veggie story, we are already eating it.
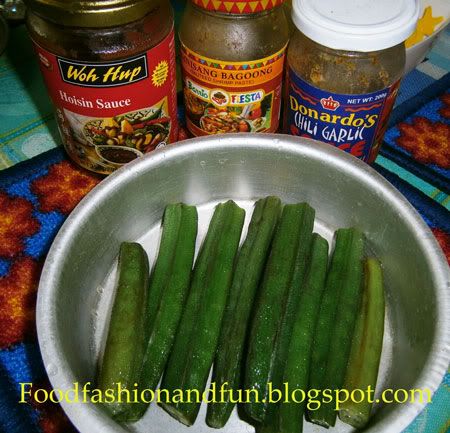
Simple Boiled Lady Finger
Before, I used to dislike squash and capsicum when I was young. But my mother influenced us siblings to eat it and it was the way how my mother prepares the veggies, shape them in cut decoration until we finally give in. I don’t have issues with okra and bitter gourd; I like them even when I was a kid.
So going back to okra, well you can do a lot of great recipes using okra with other veggies. What I just did was boil them and dip them into different sauces like chili garlic sauce, hoisin sauce or any shrimp paste sauce. If you don’t like then you can just use a simple fish sauce.
Okra or Lady Finger contains folic acid, calcium, iron, magnesium, potassium. It also has Vitamin A and Vitamin C. They say that okra is good for asthma because it has anti inflammatory effect to our lungs. It also has anti oxidant content to help fight cancer. If you have problems with your bowel movements, okra is also good to eat. It also prevents diabetes because it normalizes the blood sugar and cholesterol level. It helps cure pimples, not putting it straight to your face, what I mean is when you intake the veggie.
There are lots of health benefits we can get from okra so I really suggest that as early as possible, influence your kids to eat veggies such as okra because it has a lot of nutritional benefits.
Labels:
lady finger
Tuesday, September 13, 2011
Chicken and Mushroom Recipe
I got curious to try a recipe which only offers two main ingredients, chicken and mushroom. There are lots of ways to prepare and cook chicken with mushroom; it can be a creamy soup, sautéed with other veggies or grilled. But this recipe for me is much easier because you just need to fry it.
Chicken and Mushroom topped with coriander
Although, not fry the chicken straight in oil but boil the chicken first with 2 tablespoons of water. In this the chicken will juice up more and wait till the pan gets dry and that is the time that you will add olive oil. After that, season with salt and ground black pepper. The only flavor that this recipe gets is the salt, pepper and butter from your mushroom.
After 5 minutes of frying the chicken keep it aside and put the mushroom on that same pan. Just add an inch block of butter into the mushroom and wait for the mushroom to juice out some water and sip the butter in.
Simple and Easy to prepare recipe
After 2 minutes, you can now place back the chicken to where your mushroom is and stir them together so that the chicken will also get some butter flavor. The taste is really delicious and I can say that you don’t need a lot of ingredients just to satisfy your palate. It is that simple and easy to do. If you like, you can also bake the chicken in the oven for 2 minutes while you fry your mushroom. But in this recipe, I only fried the chicken.
You can add a side dish for this dish like carrot, green peas and corn kernel. You can also add some fresh and crunchy cucumber sticks to make the presentation colorful and your family would surely like it.
Although, not fry the chicken straight in oil but boil the chicken first with 2 tablespoons of water. In this the chicken will juice up more and wait till the pan gets dry and that is the time that you will add olive oil. After that, season with salt and ground black pepper. The only flavor that this recipe gets is the salt, pepper and butter from your mushroom.
After 5 minutes of frying the chicken keep it aside and put the mushroom on that same pan. Just add an inch block of butter into the mushroom and wait for the mushroom to juice out some water and sip the butter in.
After 2 minutes, you can now place back the chicken to where your mushroom is and stir them together so that the chicken will also get some butter flavor. The taste is really delicious and I can say that you don’t need a lot of ingredients just to satisfy your palate. It is that simple and easy to do. If you like, you can also bake the chicken in the oven for 2 minutes while you fry your mushroom. But in this recipe, I only fried the chicken.
You can add a side dish for this dish like carrot, green peas and corn kernel. You can also add some fresh and crunchy cucumber sticks to make the presentation colorful and your family would surely like it.
Monday, September 12, 2011
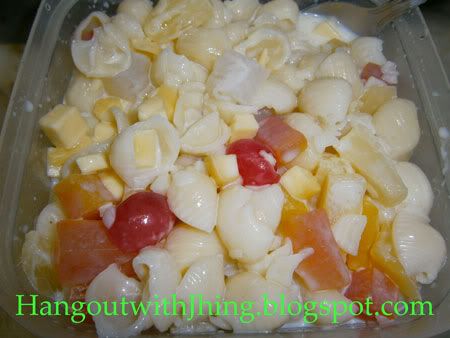
Macaroni Salad
This is one dessert which is easy to prepare and your family would love it. I don’t need to list down what are needed because they are easy to remember. What I included was a can of fruit cocktail, condensed milk, macaroni and cheese. It is much better if you include an all purpose cream which I lack here because it wasn’t available in the grocery to where we go to.
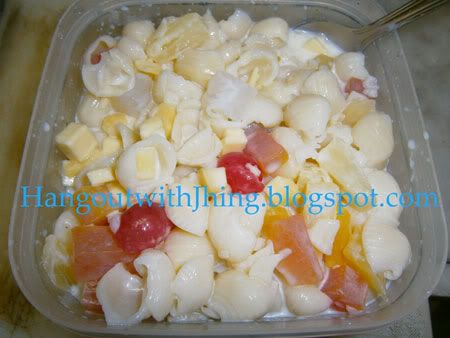
Macaroni Salad for dessert
You can optionally include mayonnaise too to keep it rich and thick. But if you are concerned about calories, then you can skip on the mayo. Just boil the macaroni by following the instruction on the label. You can use either elbow, shell or bow macaroni for your salad. Drain the water and mix it with the fruit cocktail. Some do include the syrup of their fruit salad, but as for me, I don’t want a juicy and watery salad so I drain the fruit and I don’t include the syrup.
Fruit Cocktail
It would be creamier if that all purpose cream was available, sigh!
After this are your sweetened milk and all purpose cream. Mix them all together and then slice some cheese. The cheese is better sliced in mini cubes. You can use cheddar cheese for this type of salad, not the soft and easy to melt cheese. Place inside the fridge and enjoy this wonderful delight any time of the day.
You can optionally include mayonnaise too to keep it rich and thick. But if you are concerned about calories, then you can skip on the mayo. Just boil the macaroni by following the instruction on the label. You can use either elbow, shell or bow macaroni for your salad. Drain the water and mix it with the fruit cocktail. Some do include the syrup of their fruit salad, but as for me, I don’t want a juicy and watery salad so I drain the fruit and I don’t include the syrup.
After this are your sweetened milk and all purpose cream. Mix them all together and then slice some cheese. The cheese is better sliced in mini cubes. You can use cheddar cheese for this type of salad, not the soft and easy to melt cheese. Place inside the fridge and enjoy this wonderful delight any time of the day.
Sunday, September 11, 2011
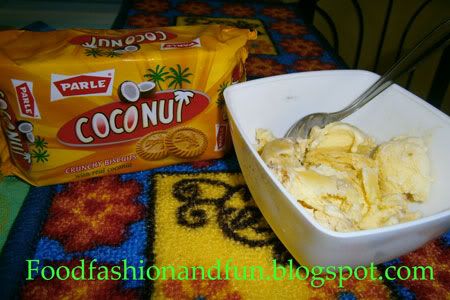
Butterscotch Ice cream with Almonds and Coconut Biscuit
Finally, it just arrived, no not the ice cream, but the digital camera that we purchased online. It was the only thing I’m waiting for in order to post good looking and quality pictures on my food blog. As you can see or noticed, my blog has been silent for 4 days and I was just busy posting articles on my other blogs which I haven’t maintained for so long.
A cozy Sunday Snack
crunchy, delicious and perfect for butterscotch ice cream
Better late than never, almost finish eating the ice cream!
Its Sunday once again and it’s raining outside. I have chicken biryani for lunch and now that I was busy again writing for more articles to be posted on my other sites; I got hungry for a snack. Luckily, I still have the last portion of butterscotch ice cream in the freezer and coconut biscuit from Parle.
Well this ice cream perfectly matched the almonds and the creaminess of the flavor just like combining vanilla ice cream and oreo chocolate cookies. Makes sense for a pretty running mind that keeps on writing. I was thinking of rejuvenating my other skills like cross stitching but on the other hand, I better hunt down a place where I can buy the materials needed.
My mind has been thinking a lot lately, not about food, but about things like hobbies that will help me earn more money just enough to save before this Christmas season comes. Its only 106 days left before Christmas and I have no ideas on what to do to save and earn more dough.
I also like the idea of baking, but I’m afraid I cannot pursue that plan for this year, maybe buying an oven will be a great start but about other baking tools and stuffs, that’s another problem since I don’t know where to buy it here and where the money is to buy the stuffs, lolz!
Hope this week, my food blog site will be back to normal again. I am still trying to find exciting ways of sharing to you more foodies and dining galore, gosh! I’m financially challenged for the next months to come so dining out will be difficult. Wish me best after two more months since my tummy is feeling so heavy now. Motherhood is calling and I hope that more exciting recipes to post here on Food, Fashion and Fun.
Monday, September 5, 2011
Spaghetti Sunday
Time for some comfy food once again! Pasta Sunday is the best that I can think of. I did prepare easy spaghetti for today’s dinner and this time, I did not include any mushroom, just plain minced beef, spaghetti sauce (not from can) of course and some grated cheese.
Spaghetti and Buttered Bread
please bear with me since I am just using a mobile cam here, soon I will have our new digicam!
I was just disappointed that I cannot take a snap of what I cooked because our cam got drenched in the rain and I am patiently waiting to get our new cam which hubby was able to purchase online but of course the delivery would take 4-7 business days.
Okay, going back to the spaghetti preparation, I also did not like the cheese that I bought. It was so soft like a quick melt cheese and it was difficult for me to grate because it was sticking in the grater, yucks! But I am just thankful to have a cheese at least since I really needed to taste spaghetti and I have checked my blog that I haven’t included spaghetti yet, maybe other pasta that I have prepared like penne arabiata and some pesto, but not yet this easy to make spaghetti.
Here is what you needed for quick spaghetti:
Onion (chopped)
Garlic (chopped)
Tomato sauce
Ketchup (sweet and spicy)
Brown sugar
Minced beef (1/4 kilo)
Spaghetti pasta
Salt
Ground black pepper
Oil
Water
Cheese
How to Cook Spaghetti pasta:
Step 1: Boil water for the pasta. Cook your pasta according to the instruction given at the back label. The pasta I have says 13 minutes to be cooked, so I followed it. Some brands are okay with 8-10 minutes, so just follow the instruction. You can definitely now when your pasta is aldente. Once your pasta is done, put it on a colander and drain the water off. Wash it with cold running water and set it aside.
Step 2: On a separate pan, put the minced beef with little amount of water and sprinkle some salt. Be sure that the water drains and the minced beef is almost dry before putting oil into the pan. Once you have put oil, you can now fry the minced beef into medium flame and then sauté it with chopped garlic and onions.
Step 3: After sautéing, you can now put the tomato sauce and ketchup and put ample amount of water into it as well as the right amount of sugar. Put into boil for 3-5 minutes and taste your sauce. You can sprinkle some ground black pepper into it with salt if you wanted to.
Step 4: You can now combine the pasta and the sauce you made and grate some cheddar cheese or whatever type of cheese you want for your spaghetti. Serve with toasted garlic bread or bread with butter.
Sunday, September 4, 2011
Yellow Watermelons
Nothing so special about it but I got curious since the outer skin was yellow so we thought that the inner flesh would also be the same, yellow. So I asked hubby to buy me one and he asked me to check the watermelons if I can detect which one is sweeter. So the traditional way of choosing the sweetest watermelon is to hear the sound when you knock it. If it resounds like your knocking your forehead, it is not yet that sweet but if you hear it deeper and sounds like your knocking your chest, then it is sweeter.
Very yellow on the outside
But very red on the inside!
I tried the usual method and it was really perfect. The one I picked out was super delicious yet super crunchy too. But sorry folks, the flesh of the said “yellow watermelon” wasn’t yellow at all when hubby sliced it. It was still red as usual but the difference was that it was extra crunchy to munch and super sweet.
The weight of it was not yet a kilo but it costs Rs56 rupees which I find costlier than other ordinary watermelons we used to buy during the summer season. But anyway, what I just did for this so called yellow watermelon was for dessert and some of the remaining part I put in the blender, mixed with sweetened milk and brown sugar and made ice drops out of it.
There are really yellow watermelons but their outer skin is not yellow in color but the usual green. I really find time to chew this type of watermelon well since it is rich in fiber and if I hurriedly chew it, I will just burp it off since my tummy is already smaller because my baby occupies it.
I am avoiding fruits such as papaya and pineapple which is not good for pregnant women and that is why we bought this watermelon. Anyway, it’s not always fruit session for me. I just balance what I eat and think only of the good benefits that it can do for me and my baby.
I will post some picture soon...need a good cam badly!
Labels:
fruits
Friday, September 2, 2011
Beef Mechado Recipe
Friends please bear with me since I cannot post well the pictures on my recipe because our digital cam said adios amigos already. It got drenched in the rain and we cannot do anything about it but to replace it anew. But don’t worry; hubby is doing everything just to get us a new one.
Anyway this recipe is my own rendition of beef mechado. The only difference I can see on beef mechado and beef caldereta is that beef calderata has liver into it while mechado has not but certainly the common ingredients will be potatoes, red bell pepper and carrots.
Since you will be using beef chunks to your mechado, it is wise to use a pressure cooker, unless you can just cook it for 45 minutes to an hour to keep the meat tender. Luckily, the beef meat here in India is tender so even if I don’t use a pressure cooker, I can still be able to make it soft for only 30 minutes.
Now going back to the recipe, what I used was 4 medium size fresh tomatoes which I sautéed with onions and used ¼ teacup beef stock for mashing it well. Most may prefer a can of tomato sauce or tomato puree which is also okay to use if you don’t have much time preparing your beef mechado. Below is the ingredients needed for cooking Beef Mechado:
Ingredients:
Beef chunks
Onions
Garlic
Potatoes
Carrot
Red/ green bell peppers
Tomato puree/ sauce
Beef stock or beef bouillon
Salt
4 whole pepper corns
Ground black pepper
Bay leaves
Soya sauce
Water
Vegetable oil
Method / Preparation on how to cook Beef Mechado:
Step 1: As I have said this is my own rendition, some prefer to sauté their beef straight with garlic and onion; while for me, I prefer to boil the meat first to get it tender before sautéing it. In this way, I can get to set aside the beef stock for this recipe. So first is to boil the beef to get it tender. Once the meat is ready, set aside the stock and the meat.
Step 2: Cut the onions in quarters. While the potatoes, red bell pepper and carrots will also be cut into quarter portions. Just cut the carrots slanted for the style. On a pan, put oil and once its hot you can now sauté your garlic and onions and then put the boiled beef meat. Then just add soy sauce into it and then the tomato puree. In this portion I separately sautéed a while ago the fresh tomatoes with onions and beef stock so what I used was not canned tomato sauce.
Step 3: Once the tomatoes are in, put the remaining beef stock or you can use some beef bouillon into it to make it tastier. Add the whole pepper corns and bay leaves season it with salt. Cover the pan with lid and let it cook for about 10-12 minutes. After this, you can now put your potatoes and carrots.
Step 4: Wait for another 5-6 minutes and check your potatoes and carrot if they are done, not over cooked. After this you can now add your red or green bell peppers and sprinkle some ground black pepper. Do not over cook the red bell peppers; they are easy to cook so 2-3 minutes will do. Just keep the lid open else you will also get the veggies overcook. Serve with hot rice and with a smile.
Labels:
beef meat
Thursday, September 1, 2011
Ginger Churma and other snacks
I promise you guys that I will feature somewhat foods that I encounter while travelling. Well indeed I was successful to find ginger churma which was being offered inside the train to where the food attendants offer.
It was a combination of interesting ingredients such as corn flakes, ginger strips, sesame seeds, dried raisins, jaggery (made of sugarcane), black dried grapes and Indian spices. It is a sweet snack which actually tasted like sweet crispy rice puffs or murmura ladoo. But the difference was obvious because of the ingredients of it.
Cheese-Garlic Naan
Another favorite of mine which we always order at Abhiksha Restaurant in Goa is this wonderful naan bread flavored cheese and garlic. The cheese and garlic was surely a good combination when it reaches your mouth. I just get annoyed when the garlic they used was cut into bigger chunks. How I wish it was just powdered garlic with cheese, it will be delightful to eat since I am not an avid fan of eating chunks of garlic leaving me to pick out the chunky garlic on the side of the plate.
Samosa
My all time favorite samosa would be only here in Mumbai. I only favored one which is being sold here near to where we live in Malad. It is kinda salty barbecue in flavor. The veggies stuffed into it were green peas, potatoes and other Indian spices. It is really crunchy on the outside and they will always give us fried green chilly and some salty crumb powder along with it. You can also try this snack whenever you visit any Indian restaurants.
Fries with Chat Masala
When it comes to finger foods, French fries tops the survey. But this potato fries that Abhiksha restaurant serve is with a twist. They do add chat masala into it and it was really great. They always serve it hot and crispy and the combination of chat masala and some spices they put was just perfect when you dip the fries in tomato ketchup. Naturally, the fries look a bit orangier in color maybe because of the chili powder. But it will never be that hot to munch and crunch.
Labels:
snacks
Subscribe to:
Posts (Atom)