Tuesday, May 31, 2011

The Flavors of India

I have here a sample photo of the spices that I mention a lot whenever I share recipes and post it here on my blog. I just wanted you to get familiar with some of the spices although this is not yet done since there are more than a hundred spices that I can add and I only showcased about less than ten.

Spices of Indian cooking
indian spices,masala


Anyway these are the top ingredients that you won’t miss whenever you cook an Indian dish or cuisine. I was supposed to label one ingredient to be Garam masala instead of just placing it Masala powder. Garam means hot in Hindi and most of the time we used whole garam masala which consist of cinnamon bark or stick, cloves, whole black pepper, bay leaf and cardamom seeds.
Turmeric is luyang dilaw in tagalog although you don’t use it as a whole but in a dried and powdered form. Ginger-garlic paste is derived obviously from fresh ginger and garlic which is just mixed and turned into paste.

About cloves, it has a very nice smell and strong taste of course. If you have toothache, you can use cloves as a home remedy for your aching tooth. It is also an ingredient here for tooth paste and it is good to fight off bacteria.

Red chili powder is derived from dried red chilies which are powderized. Another ingredient that I have mentioned here was jeera seeds or cumin. I have never seen this one in my country and never did we use it in any dish. The very first time I have seen this ingredient is when I arrived here in India and hubby used it a lot in his cooking.

Coriander powder comes from nothing more than coriander seeds itself but was just dried and powdered. I think I don’t need to further discuss cinnamon stick and black pepper since it is always available in the market unlike the rest of the spices that I have mentioned. Next time I will be posting the other spices used in India for making their dish so special.

Monday, May 30, 2011

Chicken Biryani

I was not the one who prepared this dish, it was hubby. I personally like biryani but it was really difficult to cook (according to me) because it takes a lot of effort especially calculating the rice. If the chicken was perfect in the way you cook it but if your rice does not cooperate, well that will not be a good biryani.


Hubby just used chicken tandoori for this biryani
biryani


Chicken biryani needs basmati rice in order to make a very authentic Indian Biryani. I don’t have any issues if you can cook chicken biryani using ordinary rice, but the thing is, biryani rice will never be sticky but porous or loose. In making this dish, your rice should be soaked in water for about half an hour to keep the grains softer before placing it on top of your cooked chicken pieces.

Spices are grand when it comes to biryani and you can only get most of its ingredients from an Indian food store. I don’t know if there is a ready mixed powder for biryani to make the cooking much more easier, but I guess most Indians here will never agree to the idea of short cutting a procedure for making biryani.

There are different types of biryani to cook like meat biryanis (non-vegetable) and the vegetable biryanis. But no matter how every state prepares it, the taste would simply be hot and really spicy. But what happened to hubby’s rendition of chicken biryani, well it turned out so hot and the rice got sticky even if it was basmati rice, meaning it has too much water during the process of cooking.

Hubby also prepared Raita for this Chicken Biryani Combination
raita


This was really one dish that you need to practice cooking in order to get the right consistency of the rice since you will put the soaked rice on top of your cooked chicken till it get cooked.
Biryani can’t be complete without raita. This is like a combination of your egg and bacon meal. Chicken biryani is always paired to be eaten with raita and mango pickles.

Raita is a combination of yogurt, cucumber, salt, fresh coriander leaves, tomato or carrot if you like. It is a cooler for your tongue whenever you eat that hot biryani. I’d be posting the recipe sooner once we get back home from our short vacation, but for now, all I can do is to share with you the pictures.

Saturday, May 28, 2011

Squash and String Beans with Coconut Milk

I went out to look for shrimp in a nearby market place since hubby’s not yet having an off day so we can’t go in the grocery yet. Anyway I was not successful finding shrimps since what was available that time was small shrimps and they are dried. So what I did was just snoop my fridge and found out that I still have enough amount of shrimp paste in a bottle and I can use the remaining beef since we don’t eat pork.


Squash and String Beans
squash,string beans


Most Filipino dishes sauté pork for their dish and since I needed to skip on that, I can only use beef meat and it has no difference at all in this meal. About the coconut milk, I can’t get to buy the regular coconut and scrape it manually which is too much burden for me, so I opted to buy a readymade mix which is in powder form.

By the way, I intentionally made those product labels blurred since I am not advertising any and I don’t get paid for such. Besides, you are the one to select your own brand to use for an ingredient. So here is the sample instruction of how to prepare Squash and String beans with coconut milk.

Ingredients:

Squash
String beans (not French or green beans)
Onion
Garlic
Shrimp (optional)- what I have was beef meat here
Coconut milk
Salt
Pepper
Fish sauce
Ground black pepper
Green chili
Oil
Water

Other Ingredients needed for this recipe
sangkap,ingredients


Methods / Preparation on How to cook Squash and String Beans with Coconut Milk

Step 1: In a hot oil, fry the shrimp (if you’re using shrimp) in oil before you sauté it with garlic and onions. But if you are using beef meat or pork meat, then put small quantity of water first, let it boil and drain before you put oil to sauté it with garlic and onions.

Step 2: Since I needed my recipe a bit spicy hot, I usually put the green chilies for sautéing and then next will be your shrimp paste before you put the squash. Some would put their veggies first before the shrimp paste, but as for me, I do want to sauté my shrimp paste first before placing my veggies.

Step 3: If you have cut the squash a bit thicker, then place them first before the string beans. Else if not, then just put the string beans ahead of the squash since this veggie takes time to cook before the squash.

Squash and string beans with Coconut milk
ginata,sitaw,kalabasa


Step 4: Once your veggie is in, you can now put the coconut milk and put a bit of water (not too much) since veggies can give out water too. Put into medium flame and let the veggies be cook for about 10 minutes, but please check your squash, if it was cooked already and your string beans still stiff, you better remove those squash and place them back again once your string beans are done. You don’t want to smash those squash right?

Step 5: You can put salt and ground black pepper to taste. I also prefer to use fish sauce for this recipe so it’s up to you which one should you like to include.

Note: You can also try to use dried anchovies in this recipe, but see to it that you put the dried anchovies; right after you put the veggies.

Friday, May 27, 2011

Cauliflower with Shrimp

What’s this an experiment? This is what hubby told me when he saw what I have cooked. Well I said I don’t know what to do with the cauliflower and since shrimp can be sautéed with this veggie I said why not try it, after all it would still be palatable. Not because he wanted to annoy me and insult what I have cooked for him, but it’s always his routine to ask me what I call the recipe particularly if he is not familiar with it. He knows that I cook Filipino dishes and one of his favorites was Sinigang and Adobong Manok.


Sauteed Cauliflower with Shrimp
cauliflower,shrimp


Anyway, nothing too much too fancy about this dish since it does look the same or almost near to Chopsuey which if I have carrot, sweet peas, French beans and mushroom, I would go and divert my cooking into such. But as for the moment that these were just my ingredients, I decided to just sauté the shrimp along with cauliflower.

I don’t intend to put too much water in my veggie meal. It’s just not my cup of tea I guess when it comes to such recipes. Probably if I were to prepare a soup and something like that, it is already common sense to see water and your ingredients swimming along with it.
Filipinos can eat a meal even if they don’t have soup or if the dish is not that watery. But my husband is not used of eating such dish since his mother got him used of watery food. I call it watery which means even a curry meal, for them it float with water, not just ample enough for a sauce or creamy texture, but a lot of it. Not all curries are the same when you cook it especially if its vegetable curries.

Now what I did with this recipe was just sauté the shrimp with garlic and onion. After that I sprinkle a bit of turmeric powder and put the green chilies to make the dish a bit spicy than usual. After this I put the cauliflower and some water. I just seasoned it with fish sauce and then sprinkle ground black pepper. It does not take much to cook this veggie but you need to cook the shrimp well. You can also put some shrimp broth cubes if you like and add more water if you like. You can’t go wrong in this recipe, it’s just easy to prepare.

Thursday, May 26, 2011

Fried Parval or Potol

Parwal, Parval, Potol or in English Pointed Gourd is one vegetable that I have tasted in India. It is not available in my country Philippines and I don’t know why since Philippines and India are just the same in weather condition. But anyway, when I tasted this vegetable as my mother in law fried it, I really liked it. It tasted much yummier than fried eggplant.


Fresh Pointed Gourd or Parwal
fresh parval,potol


It is crunchy specially the seeds of it. You can cook it in different ways. You can sauté it, curry, fry, or anything else that I can see online when traditional Indian cooking is concern. From different states and regions of India, they have a vast selection of recipes including this veggie.

Trichosanthes dioica is rich in Vitamins A and C and has also trace minerals of potassium, magnesium and copper. It is a vine plant which is similar to squash and cucumber. It is small, round to thick in size that grows 5-15cm and it grows in a hot and humid weather condition.
When the seeds inside are darker in color, it means it is kinda older, but when it was just white, it is still young and tender.


Fried Parwal with Sponge gourd curry and hot rice
potol,parval,pointed gourd


What I just did here was marinate it with salt, turmeric powder and red chili powder. You need to put in a container and shake it well so that the powders can mix well with salt and your parwal will be very tasty when fried. The longer you marinate it the better. You don’t need to put too much oil when frying it. Just a small amount will do and when you know that the color turned brownish, it is done.

I do enjoy eating this veggie with any food which is curried or with any soup. In the picture that I showed I paired it along with sponge gourd curry. Next time I will try to cook parwal with potatoes, the Gujarati style.

Wednesday, May 25, 2011

Kerala Beef Curry

I just borrowed this recipe to try and see if it is something worth cooking. Indeed it was, the beef was so tasty and tender. It would have been much better if there were potatoes at that time but since I don’t have, I leave it as is.

Kerala is a place in South of India. I haven’t been there personally but hopefully soon after I give birth and if hubby would like us to visit the place. It is a place where fishes are just cheaper compared to the prices here in the city. Anyway not all Indians eat beef particularly the Hindus.

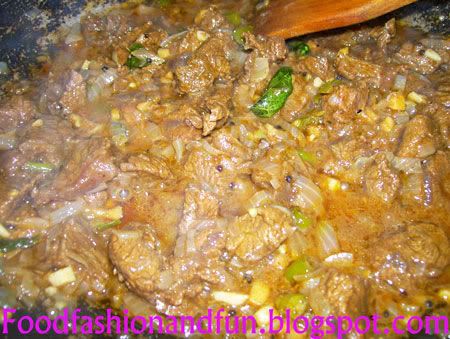
Delicious Kerala Beef Curry
beef,curry,kerala


This dish is one of Kerala’s great recipes so I really tried it out. One day soon, if I have the time, I will be posting here pictures of ingredients so that you can also be familiar of the spices we have in India. Below is the instruction of how to cook Kerala Beef Curry.

My voluptuous meal, Rice with Kerala Beef Curry and Sponge gourd recipe
rice,meal


Marinate the beef by combining all the ingredients below:

Beef (sliced into one inch)
Red chili powder
Salt
Vinegar
Turmeric powder
Coriander powder
Garam Masala Powder

The longer you marinate the beef the better since it would really sink in the taste plus the vinegar is a very good tenderizer making your beef soft.

Other ingredients needed: (not included in marinating your beef)

Onion (chopped)
2 cloves of garlic (chopped)
Ginger (peeled and chopped)
3 green chilies (chopped)
Oil
water

For tempering you will need: (1 tbsp. coconut oil, 1 tbsp. ghee or clarified butter, mustard seed, dried red chilies and 5-6 fresh curry leaves)

Instructions for cooking:

Step 1: In a pan heat the oil and put the marinated beef. Don’t worry if your beef juiced out water. This is needed in order to fry the beef well. Once the water is drained and the oil starts to fry the beef, you can just add more water into it and let it simmer for 45 minutes in order to tenderize the beef. You can use your pressure cooker so that you can ease up the cooking process.

Step 2: Once your beef is tender keep it aside and use a separate heavy bottomed pan for sautéing the other ingredients. First you need to put oil and heat it up then you can add your garlic, ginger and onions. In this process you need to make the onions golden brown. It will take time so put a tablespoon of water and cover the pan. Once the consistency is a brown colored paste, then that’s the time you can add the beef you have kept aside.

Step 3: Add more water to your beef and simmer it again for another 5 minutes and put potatoes if you have and if you want. Potatoes should be cut into diced in order to cook it easily else it will take more time.

Step 4: This is the last step, which is tempering. On a separate pan, put the coconut oil and ghee. Once it is hot you can now add the three ingredients remaining which is the mustard seed, the dried red chili and the fresh curry leaves. Cover the pan so that when the mustard seed crackle, it won’t be messy. If the mustard seed stopped crackling, then you can now transfer it on the pan to where you cook your beef.

This recipe is really delicious and I hope that you try it at home. You can buy your spices at any Indian store, about the curry leaves, if there’s no fresh ones, you can either try the dried if that was available.

Tuesday, May 24, 2011

Sponge Gourd with Mustard Seed

I am definitely encouraging everyone here to try and cook more veggies to your family. It is really a healthy lifestyle and cheaper to your budget. Well, this recipe is just so easy to make especially if you have the following ingredients. But as for sure, I know that you can avail in your place any type of sponge gourd or ridge gourd (loofah) / patola which is just cheap.

It is soft, watery and it is in the family of Cucurbitaceae. It is rich in Vit. C, riboflavin, magnesium, zinc and thiamin. It is low in fat and calories perfect for those who likes to trim down their weight. This vegetable contains insulin like peptides which is good to lower down blood sugar. It is also good for our stomach since it helps overcome constipation.

Young Sponge gourd with Mustard seed
luffa,veggie


It does not matter if you use sponge gourd or the ridge gourd for this one, they will just taste the same. Here is the quick recipe that I want to share with you.

Ingredients:

Sponge gourd / Ridge Gourd
Medium size onions (chopped)
2 cloves of garlic (chopped)
Turmeric powder
Red chili powder
Mustard seed or rai
Salt
Ground black pepper
Water
Oil
Fresh coriander leaves

Preparation / Method of Cooking Sponge gourd with mustard seed:

Step 1: Heat oil in a pan and put the mustard seed. Once it crackles you may now add your garlic and onions. Next is to put some turmeric powder, red chili powder once the onion is golden brown in color.

Step 2: Put some salt and then your sponge gourd which is cut into half a ring in size. You can put some water for about 2-4 tbsp. only since this veggie will produce water of its own. Cover the pan and put the flame into slow.

Step 3: After 3 minutes of cooking, check the taste if it still requires more salt and you can now sprinkle some ground black pepper and for the final touch, put the chopped coriander leaves. Don’t overcook the sponge gourd. It is soft so you don’t even need to worry about extending more time to cook it, not unless the gourd that you bought was old already with thick seeds, you may need to add few more minutes.

Monday, May 23, 2011

Fried Shrimp Masala

This is one of the easiest foods to prepare although the only thing that will just slow you down is when you clean it. I really don’t like removing shells and de-veiling it since it does sting me no matter how careful I am. But I was so hungry at that time so I have helped hubby in cleaning it. Hands do stink naturally after cleaning prawns or shrimps and you needed a good hands sanitizer and soap for this one. Anyway so much for complaining, what we just prepared for our shrimp is putting masala into it.

Fried Shrimp Masala
shrimp,fried,masala


It consists of turmeric powder, red chili powder and salt. Marinate the shrimp for quite some time before frying it in a hot pan. You don’t need to put a lot of oil when frying shrimps. Just an ample amount of oil will do and shrimps will juice off water so expect that your pan will get watery before it drains and cooks well with that oil. Anyway as long as you don’t put the stove into high flame and you should really stir it well so that your shrimp will be cook well.

I do like to pair this recipe with any vegetable dish and curry. Just one reminder to all who eats shrimps or prawns, never ever take anything in between which is rich in Vit. C. You can eat that fruit which has vitamin C after an hour you consume prawns or shrimps. Why? It’s because our body will have a bad reaction producing arsenic in the body which can be fatal. So Shrimp + Vit. C = POISON. I don’t know if you may call it a fallacy, but better to take care of our health rather than to say this as a hoax.

Sunday, May 22, 2011

Chicken Pulao

It’s not a perfect chicken pulao for me, but at least I tried my best for this dish even if the ingredients are not complete. First of all it was so fussy to cook which really consumes time and if you are in a hurry to prepare dinner or a meal, well I would suggest that you need to skip this dish and save it for those times when you’re the queen of the kitchen and has ample time.

Why? Well first of all, the recipe would need time to marinate the chicken. Next you need a grinder for the toasted spices and then next are cooking the chicken and soaking the rice. I really sweat a lot on waiting for the chicken to be done as well as the rice. If you miscalculated the amount of water, this means you’re rice will also be in danger, I mean it will be hard on the inside and sticky on the outside. Well anyway here is the sample instruction if you are interested to try Chicken Pulao.


Chicken Pulao not yet garnished with coriander
Photobucket


Marinating the chicken:

Cut the chicken into cubes or medium pieces. Put yogurt, salt and red chili powder and marinate it for hours.

Grinding the spices:

2 tbsp. of poppy seeds
4 pcs. Cloves
Cinnamon bark (small cut portion)
4 Cardamom seeds
4-5 tbsp. of Grated coconut

Instruction: Toast the following spices except the grated coconut. Put it in a grinder and make a paste out of it by combining the toasted spices with coconut and 2 tbsp. of water. Set it aside.

Rice: You can use Basmati rice for the best possible option for Chicken Pulao. But what I have was just ordinary rice so anyway I soaked it in water for 30 minutes.

Cooking Chicken Pulao:

Step 1: Heat the pan and put oil. Next you need to put jeera seeds, hing, whole garam masala and onions. Put salt in your onions to cook it easily then next is to put turmeric and then ginger-garlic paste.

Step 2: When your onion is done, you can now put the spices paste that you grinded then next is put 2 tbsp. of coriander powder and 5- 6 pcs. curry leaves.

Step 3: Stir the mixture and now put all the marinated chicken and add one cup of water as you cook the chicken for 15 minutes.

Step 4: Once you can see oil on the side of your pan, you can now put the soaked rice on top of your chicken and keep the flame in slow and cook it for 5 minutes. After this you need to add more water to your rice to keep it moist and now you can stir the rice all together with the chicken. Taste it if it needs more salt to taste.

Step 5: Cook your rice for another 20 minutes, but be sure to check your water and rice if it is really cook. I suggest you use a thick bottomed pan or cooker which is also a non-stick pan so the rice won’t stick at the bottom. Also keep in mind to put the flame on a slow so that the rice and chicken will be cook very well. Garnish it with fresh coriander leaves and serve it hot.

Saturday, May 21, 2011

Lauki Sabji or Bottle Gourd

I don’t usually cook bottle gourd or “upo” in tagalog because I do like to pair it with misua which is not available to buy here in India. Anyway there are many ways to prepare this veggie so I have tried this one since I have the ingredients.

About the health benefits of bottle gourd, well it has cooling effect because of its water which is calming, diuretic and so easy to digest. It is also considered that bottle gourd is good for balancing liver function. It is also a good treatment for stomach acidity, indigestion and ulcer. Here is the instruction of how to cook Lauki Sabji or Bottle Gourd.

Lauki Sabji with jeera seeds
upo,bottle gourd


Ingredients:

Small to medium size bottle gourd (the younger the better)
1 Onion (chopped)
3 cloves of garlic (chopped)
1 tbsp. ginger-garlic paste
Turmeric powder
Hing
Chili powder
Salt
Ground Black pepper
Coriander powder
½ teaspoon Jeera seeds (cumin)
1 fish bouillon cube
oil


Preparation/ Methods of how to Cook Lauki Sabji

Step 1: Buy a bottle gourd which is young. You will know if your lauki or bottle gourd is young when it does not have hard seeds or any seeds at all. Cut the bottle gourd into half and then cut it again another half to make semi rings.

Step 2: Wash of the bottle gourd in running water. And place it in a bowl with water so that your bottle gourd will not turn brown or dark.

Step 3: Heat the pan and put oil. When the oil is hot you can now put hing, jeera seeds, garlic and then onion. Put salt and then turmeric in your onion and next is ginger-garlic paste, coriander powder and chili powder. It’s up to you how much you put on chili powder.

Step 4: After you have put all the powder ingredients, you can now put the bottle gourd, half a teacup of water and fish bouillon. Simmer for about 4-7 minutes and taste it. If it’s not yet enough you can add more salt and ground black pepper.

Thursday, May 19, 2011

Chicken soup with Penne

My stomach felt really bad last week so I needed some chicken soup to eat and this is what I have prepared. I ran out of macaroni so I have substituted penne pasta. I know that penne can only be good to eat on arrabiata or any pasta meal which is rich in sauce. But I have just tried an experiment to see what penne can also do with any chicken soup.

Indeed it has no difference to macaroni in taste but the only thing is that it is harder to cook. I mean it takes longer period of time to make it aldente. Usually penne pasta takes 10-12 minutes of cooking but this one took me 15 minutes to satisfy my taste bud. I don’t like to chew on hard or half cooked pasta so I see to it that I needed those extra minutes to make it softer.
In preparing this dish, you just needed to boil your chicken first before sautéing it in garlic and onion.


Chicken soup with penne pasta
chicken soup


Personally, I don’t like bloody chicken which means when you cut the inner part, there are still traces of clot in between bones and fleshy part. That is why 10 minutes of boiling is convenient for me before I put cooking oil and sauté it with garlic and onions.

I also included some chicken bouillon cubes to make the taste more delicious. If there was a veggie that you can include in your chicken soup, that will be carrots but at that time I don’t have one so you won’t be seeing any. Once the chicken is done for sautéing, you need to put chicken stock or water if you don’t have any stock, then put the penne pasta.

You can add milk to this dish as long as your milk is evaporated and not condensed or powdered. But if you don’t have milk, you can substitute any quick melt cheese and that will be sufficient enough.

Wednesday, May 18, 2011

Nutritious Lassi Drink

Lassi is a popular drink originated in the province of Punjab, India. It is a healthy drink which consists of fresh yogurt, water, milk, sugar, selected fruits and other spices included. You can have a lot of flavors in your lassi but for me I just preferred to have plain lassi which is without any fruit flavors and spices.

I did make lassi drink because my stomach has been feeling bad for the past week. It was the water that caused it and to remedy it, I have to make some natural or ayurvedic approach as what they say here which is all natural and without any chemical treatments.

Probiotic yogurt needed to make Lassi Drink
yogurt,probiotic


I don’t just use ordinary yogurt bought at dahi stores. Most of these yogurts bought on local stores are rich in fat and tendency is that it is hard to digest. What I regularly buy to make lassi is a probiotic yogurt or probiotic dahi which is rich in fiber, has live bacteria that are good for digestion and help ease my condition.

Consider buying only fresh yogurt by checking the manufacture date
dahi


I am not endorsing the product brand, all I am saying is that when you do buy your fresh yogurt, consider reading the labels and the benefits one can have disregarding the price of course. What I did for making lassi was just mixing it in a blender and put sugar, pinch of salt and tablespoons of water.

Cold and Refreshing Lassi Drink
lassi,drink


I don’t like to put too much water because I don’t like my lassi so watery, I like it creamier so I just used ample amount to make it rich and creamy and yummy. Maybe you can see on the picture that I have included lassi as my snack together with popcorn. Popcorn is a healthy snack to consider and that is why I make it a point to include it. I like to refrigerate my lassi first before drinking. It makes me feel so refreshed and it really invigorates ones feeling. Care to have some?

Tuesday, May 17, 2011

Pinoy Chopsuey

Later did I figure out that there are different ways countries around the world prepare their own version of Chopsuey. In America and here in India, they serve their Chopsuey with noodles that are fried first, but in my own country Philippines, when you talk about Chopsuey, it means veggies with some meat products like chicken, chicken liver, shrimp and pork that you can add in this delightful dish.

The possibility of choosing veggies in this dish is really vast although you cannot just put any veggies you like, e.i. squash, okra, drumstick, bitter gourd, round gourd and any beans (lentil). If you want to prepare this dish, you can choose veggies like cabbage, cauliflower, broccoli, bokchoy or Chinese petchay, capsicum or bell peppers (red or green) in color, sweet peas or snow peas, green beans, carrot, and mushrooms.

Lacking colors like red capsicum and shrimp to make it more appealing...
chopsuey,pinoy dish


It is one of the most delicious veggie meals since it is very colorful and I like the way how crisp and fresh my veggies are when Chopsuey is being served. Although in what I prepared, I did lack color since I don’t have a stock of red bell pepper and shrimp to give additional colors in it. What I just have were cauliflower, carrot, green bell peppers and cabbage. I just wish I have mushrooms there and shrimp but anyway the chicken meat and the liver gave enough justice to make it so called Chopsuey.

Of course I also used oyster sauce in my recipe and most important is to keep the sauce creamy a bit by putting corn starch and little bit of water in a mixture as the finishing touches to your cooking. But just don’t overcook your veggies. It will not be that exciting to bite capsicum if it is already soaked and the color turned darker. Even those carrots, you don’t want to eat overcooked carrots right? So just make sure your flame is kept on a medium flame and when placing those veggies, keep in mind to put the hardest first like cauliflower.

You don’t need to worry about carrot because it is much healthier to eat it half cooked than overdone. The last veggies that you will include in this dish are the capsicum since they are easy to cook. I suggest you don’t cover the lid so that the color of the veggies remains the same even if the stove is already turned off.

Monday, May 16, 2011

Vegetable Chow Mein

I had no idea of this recipe yet since I just ordered it. I do have the impression that chow mein differs from locations where chefs prepare it. What I do know is that it is a Chinese dish and it is commonly available when you order it from a Chinese restaurant.

But the thing is, I did not order it from a Chinese restaurant but an Indian restaurant that serves Chinese cuisines and I don’t know if they have given justice to this recipe or not since when I browse it online and look for pictures of what vegetable chow mein would look like, they are different varieties that showed up and the preparations vary from veggies to style of cooking. Some chow mein are dry, some are soupy and creamy which I have ordered.


Steaming goodness of Vegetable Chow Mein
vegetable,chowmein


I was really tempted to try what it would taste like when ordered from a local restaurant here in our place. Well, of course their usual veggies here include cabbage strips, carrot and spring onions. I was expecting they would also include some mushrooms, snow peas and broccolis but not. About the type of noodles, well the usual thing here is the egg noodle type, so it would never be like any thin noodles or flat ramen type.

There goes their noodle doodle...
vegetable chowmein


It tasted a bit like chopsuey but with noodles. I just like it when it was delivered home hot and fresh, still steaming with its goodness for the price of Rs 80.00. I immediately transferred it to a bowl and mixed it well so that the noodles and veggies would blend well, sorry no chop sticks included. Anyway if I have to do my own chow mein, I would definitely include those veggies I have mentioned above. If I have to rate this recipe that the chef cooked, I would give it 6 out of 10.

Sunday, May 15, 2011

Southern Fried Chicken

I was thinking what to do with the remaining chicken I have since hubby prepared curry before. I don’t like to cook another curry out of it so I said why not fry it but not the usual way that I would fry my chicken.

So I came to research about this recipe and I tried my own version even if I would not exactly prepare it the way they do since first of all I don’t have a deep fryer and second I don’t have on hand buttermilk which I just substituted low fat skimmed milk and put vinegar in it. Anyway the taste was a passing grade and for me I can say that another day has passed and I did my very best to come up with this recipe.


My very own Southern Fried Chicken
southern fried chicken


I also don’t have Tabasco sauce or chili sauce so I improvised another substitute which is the sweet and hot tomato ketchup that I have. Another substitution I made was ginger garlic paste instead of the original garlic powder to be included in the flour mixture. I didn’t include my ginger garlic paste into the flour mixture but to the marinated mix so that the chicken would sip that flavor. The more you soak your chicken into your marinated mixture the better. I only soaked the chicken for about 5 hours and at least it was that tasty.

Another thing I substituted for an ingredient was paprika, to give color to your chicken this is needed but since I don’t have it in my stock, I just simply used chili powder although it didn’t really make the chicken hot and chili. So friends, here is the instruction on how to prepare Southern Fried Chicken:

For marinating your chicken:

1 cup buttermilk (if you don’t have just use low fat milk and 1 tbsp. vinegar)- leave for 5 minutes
Salt
Ground black pepper
¼ cup Tabasco sauce
1 tbsp. Ginger-garlic paste (optional)

It’s up to you how long you marinate your chicken, the longer the better. After marinating your chicken you can now, prepare the second mixture for your chicken.

Dipping the chicken:

1 egg
Salt
Ground black pepper
Put 6-7 tbsp. of your marinated mixture and mix the ingredient above before dipping your chicken

Flour mixture:

This will be the last procedure once you have dipped the chicken into the egg mixture; you need to roll it on this flour mixture. Be sure to double dip and double coat your chicken pieces.

1 cup flour
Salt
Garlic powder
Paprika (what I put here was chili powder)- this is for the color of your chicken


Place them in a dry pan to get the chicken dry first and heat the pan. If you have a deep fryer the better since the chicken will be well cooked. But if you’re using a pan, make sure your oil covers those chicken pieces so that they will be cooked well. Cooked the chicken meat for about 8-15 pieces depending on the size. If it was a bigger piece, 14-15 minutes will do best. Hope you enjoy this crunchy delight of Southern Fried Chicken.

Saturday, May 14, 2011

Beef and Potatoes Omelet

I didn’t put all my minced beef and potatoes into the pan when I cooked it yesterday. I subdivided it and cook it with egg and made an omelet out of it. I just wish I had cheese and grated some to put it in my omelet but anyway, it was as good as this one anyway.


Minced beef and potatoes omelet
omellette,beef,potatoes


Simple ways to prepare your omelet:

Potatoes (cut into smaller dice) so that it can be easier to cook
Beef (toast it first) I don’t include it as raw because some minced beef are hard and rubbery

I do cook my potatoes first before I include it in egg. Why? It’s because I don’t want it hard from the inside while your egg was already over toasted on the outside. About the beef, what I can instruct you to do is to boil it first with enough water, meaning if you’re going to use ¼ kilo of minced beef, then your water should be about 4-5 tbsp. of water. Once the water is drained, then that is the time that you can put your oil and toasts the minced beef.

But if you like to put raw minced beef and raw potatoes, on your omelet it’s up to you, but I can guarantee you that it will be hard and rubbery and the egg will be overcooked. When combining the two ingredients together with your batted egg put some salt and ground black pepper first on your mixture so that there is taste in your omelet.

Never put a lot of oil when frying it, you can just add 2 tbsp. of oil and that will be sufficient if it’s only a portion of beef and potatoes. But if you have more than ¼ kilo, well you can figure it out obviously if the pan needs more oil or not. It will be bubbly and froth once the beef and potatoes soaked in egg are placed in the pan. Use a big flat spatula to overturn the omelet and avoid messing it.I don’t have a measure cup for placing the omelet into perfect round; just a spoon to place it in but it’s still gorgeous to look at. Hope you like this meal!

Minced beef with potatoes

Its beef and potatoes for the day since starch are also needed by our body as well as protein. I have mince beef this time to match with potatoes and I diced them in small sizes so that it can be cooked well.

It is also great to match potatoes with corned beef although there are no canned goods here (particularly beef) being sold in the market since it is a Hindu nation. Anyway, hubby bought this mince beef in a store nearby since there are Muslims and Christians who sell it. I know that at home we used to include sotanghon or vermicelli bean thread noodle in this recipe. It is just easy to prepare although for me what I like is to toast first the mince beef by placing water and let it boil for some time. I added salt so that it will have a taste and once the water is gone, I can now put oil and cook it further.

Easy to prepare minced beef with potatoes
beef,potato


I like to toast the beef well till it gets that dark brownish color. About the potatoes, make sure that it was just sliced smaller so that you can cook it very well. Once your beef is done, you can now sauté it with garlic and onions. Then you can put the diced potatoes and add some water.

On this recipe, I don’t put too much water. It was just half tea cup water which is enough for simmering the beef and potatoes. Once your potatoes are half cooked, you can season it with soya sauce, salt and ground black pepper. There’s no problem if you wanted to add more flavor by putting some beef bouillon while simmering the beef and potatoes.
If you want some more flavor and color, you can add green and red bell peppers into it, but for this recipe, I don’t have a stock so you won’t be able to see in the picture. I have another version of cooking this recipe but I will post it by tomorrow. Hope you try this delicious recipe also.

Thursday, May 12, 2011

Sautéed Bitter gourd with beef and egg

I know what will be your reaction, yucks! Most of us don’t like bitter gourd obviously because it was bitter. I don’t even push hubby to try it since he was not used of eating bitter gourd. I do know why I like this recipe but this has something to do with influence.

Our parents brought us up to eat veggies and that includes bitter gourd. I used to remember my grandmother who cooks this veggie with tofu and pork while my mom sauté it with chicken and sotanghon (bean thread noodle). I also like bitter gourd in braised beef and sometimes we just cook it with an egg. I also like Pinakbet (Ilokano dish) which includes bitter gourd.

So during my childhood days, I don’t have any problem eating bitter gourd and that is why it is important for me to influence my children (to-be) to eat veggies and not to be choosy in food. I have learned that convincing your kid would also help aside from telling them those stories about how nutritious the food they eat. I also remember how my mom says she likes this veggie and for us kids, we do like to imitate our parents and also like what they like. Sautéing is the easiest thing to do with this recipe although I just included egg and beef bouillon cube. Here is the recipe for Sautéed Bitter gourd with beef and egg:

Ingredients:

Medium size bitter gourd
1 medium size onion (chopped)
2 cloves garlic (chopped)
1 beef bouillon cube
Soya sauce
Salt
Ground black pepper
Water
Oil
1 egg

Preparation/ Method on How to Cook Sautéed Bitter gourd with beef and egg:


Bitter gourd anyone?
bitter gourd,ampalaya


Step 1: Wash the bitter gourd in running water. Cut it in half lengthwise and remove the seeds by using a spoon and shovel it off. Cut the bitter gourd looking like half ring, not too thick and not too thin.

Step 2: On a heated pan, put oil and once your oil is hot, you can now sauté garlic and then onions. Put some salt to cook your onions faster. After this you can now put the beef bouillon cube, stir well to blend with your garlic and onions and now you can put the bitter gourd.

Step 3: Stir the bitter gourd with the sautéed garlic and onions with beef bouillon and put soya sauce for about 2-3 tbsp. and then add some water 4 tbsp. only, not too much water since this veggie will also produce water.

Step 4: Put the flame on medium heat and wait for 3 minutes and sprinkle some ground black pepper. If you think the taste is enough, don’t add more salt; else if it is too salty for you just add some tablespoons of water but not too much water. Again, do not overcook your veggie. The last is crack an egg and stir it well together with the bitter gourd. Stir it properly and make sure that the egg is cooked well (not gooey) before you put the stove off.

Tuesday, May 10, 2011

Mushroom Hakka vs. Singapore Noodles

Does it make any difference at all? At first when I glace at it, it does not have any difference since both the noodles are just the same. Although the ingredients to both are different since Mushroom Hakka Noodles obviously does have mushrooms while Singapore Noodles does have Cashew Nuts and big chunks or dried red chili and without any mushrooms.

About the taste, well I can still say that it does not have any big difference since both are sautéed and stir fried noodles. The common denominators for both the recipes are spring onions, capsicum, carrot and cabbage strips. But the taste would be much better if they have put soy sauce into the dish. Anyway, sprinkle it with lemon and a dash drops of soy sauce would be more appetizing to do. In fact, I don’t have any bread to match this noodle recipe although I still ordered some pizza (local one) and it went well perfectly.


Photo above: Singapore Noodles vs. Mushroom Hakka Noodles (pic below)
noodles galore


Sunday is my relax day and it’s really not my intention to be so sluggish preparing something to eat. But I just wait for the time to go out and buy ingredients for decent food to prepare. Everyday menu is what I wanted to make a list of but I guess it will be more difficult here since most of the veggies and menus I know of, well we don’t have it here.

I don’t want to be redundant on the food item that I prepare and that is why every day is really a challenge for me. I keep asking the same questions again and again, what to cook? What to prepare? A wife should always be consistent and innovative in the kitchen particularly on cooking food for her family. Can’t help thinking that another day like this would happen and I really don’t want to burden hubby about ordering food outside since it is really not practical these days.

Hmmmm, well it’s another day, I just hope I can present a good recipe by this week as I keep myself a bit busy online to get back on the track before we go again for another short trip. Enjoy your weekends!

Monday, May 9, 2011

Singapore Noodles and Mushroom with Cheese Pizza

That’s what they call it on their menu, “Singapore Noodles”. I am sure Singapore has nothing to do with it, just like that! Anyway, another day with no time to prepare meals so we dependently ordered at Radhakrishna Restaurant and they delivered it for free. I didn’t even cooked rice so I said to hubby; why not order a pizza along with it since they have vegetarian pizza so I ordered Mushroom and Cheese pizza. It was delivered hot and fresh in our door steps for about 20- 25 minutes.


Yummy Mushroom and Cheese Pizza!
Photobucket


Well the noodles have whole cashew nuts which are slightly roasted and the veggies are really raw and crispy. I said hard because it isn’t cooked and I really hate to chew strips of cabbage. I have no problems with raw carrot strips but the cabbage, aww forget it, I’d be skipping it or keep it aside the plate. They also have included big chunks of dried red chili, anyone dares to eat it?

At least the noodles aren’t burnt and smoky smelling like the once we ordered on a different restaurant. Spring onions are all around and complimentary sauces were also given like Chili sauce, dark soy sauce and tomato ketchup for the pizza.


Singapore Noodles available at Radhakrina Restaurant
Photobucket


About the pizza, well it does taste like the local pizza that we order in the cart. This restaurant offers only pure veggies so forget the pepperoni and other meaty toppings for your pizza. What they have was cheese, mushroom, paneer (tofu) and tomato. But on what I ordered, you can see only cheese and mushroom on it. The price was affordable enough since the pizza was sliced into 8 while the noodles can be eaten by three to four persons.

The pizza costs only Rs90.00 and the noodles for only Rs.85.00 but the tendered bill was Rs 185.00; well I guess that extra Rs10 will be the charge for delivery even if they say it’s free of charge. But I don’t complain on that, nothing at all since they have delivered it on time and the food was great so that would suffice. ..verdict, day complete…stomach is full!

Saturday, May 7, 2011

Egg Curry

No options left since it is almost end of the week and hubby’s off will be by two more days so I won’t be able to go to the grocery to refill our food stock. What was just left in the fridge were dozens of eggs so he decided to cook me an egg curry for lunch.


Egg Curry for Lunch!
Photobucket


I was really not in the mood to cook since I have difficulty eating what I prepared so good thing hubby gets up earlier for a haircut and then cooked our food. I was just the one who boiled the eggs and prepared cutting the necessary ingredients like onions, garlic, preparing the masala, placing the remaining coconut milk and then the rest is for my dear to cook it.

At least it wasn’t that spicy hot unlike the mutton curry he prepared. Some egg curry would just include yogurt, but this one, we did not put any since we need to use the remaining coconut milk so that it won’t get spoiled. Now if you can see some seeds in there, they were mustard seeds and jeera or cumin seeds. The rest of the leafy parts would be the curry leaves and coriander leaves.

After boiling the egg for ten minutes remove the shell and cut the egg into half before frying. This will make the egg hard enough not to mush on the curry itself. But when you need to get the creamy part done, be sure you have included enough masala and coconut cream for the right taste. This means adding salt is up to you. By the way, hubby grinded the onions and green chili until they become like a paste to give more texture to the curry.

Some curry will be reddish in color due to red chili powder that was included although we didn’t put much and the turmeric gives more of the yellowish color which embeds the coconut milk. So the end result when cooked was that it turned yellowish. Egg curry is great to combine with papad, lentils or chana masala dish... Bon Appetit!

Friday, May 6, 2011

Mutton Curry with Coconut Milk

At last a goat’s meat for dinner and hubby bought it in a local market nearby which costs about Rs140 for 500 grams. I was thinking that it is good for caldereta but I don’t have any caldereta mix with me, I just told my husband to cook curry the way he likes it.

It was his off day so he has the time to prepare this wonderful dish and all I need to do is to help him with the preparations like cutting the onions, setting aside the spices or masala needed for the curry and of course cleaning and boiling the goat’s meat first.


You can see mustard seed and jeera in this Mutton Curry recipe
mutton curry,mutton


Mutton needs to be boiled first to get the meat tenderized. We did choose a portion with meat and bone parts so that the curry would be so thick, rich and yummy. The coconut milk is perfect to make the curry very rich in taste and the taste really sticks to the bone. But if you think this curry is like any other curry, well it is not since it is not reddish in color but more on yellowish. It is also chili hot and if you don’t like hot and spicy foods, then this dish is really not for you.


Rich and Thick Mutton Curry sprinkled with Coriander leaves
mutton,curry


I really got used of eating foods with spice but I just know how to limit myself on what I can take since too much spice is not also good for me and I am already having breakouts on my face. Anyway, it’s just once a while that we do eat mutton since it is much cheaper to consider other meat like chicken and beef.

We don’t have potatoes at the moment, but we can include potatoes in this dish. The finishing touches for completing this dish are the fresh coriander leaves. This makes the taste of every curry much more interesting aside from the curry leaves that we also included in this meal.

Thursday, May 5, 2011

Chili Chicken Delight

I don’t have any meat stocked in the fridge so I asked hubby to buy some cooked food outside at the local restaurant near our place. I instructed him to buy any mutton or chicken and when he came back it was chicken since mutton meat wasn’t available.

Red and Fiery Hot Chili Chicken
chili,chicken


It was really creamy red in color which I really presumed would be very hot and spicy. Well, I can’t complain now since most foods here will be that hot and it will be impossible for a single meal in India were chefs would not include any chili or chili powder in their dish. Anyway, it was hot and steamy when hubby bought it since they really prepare the meal on the dot and you need to wait for 10-15 minutes. So I just prepared rice at home so that by the time our food comes, it will all be ready.

We don’t regularly order out food since I personally prepare the foods we eat but whenever we ran out of food stock that is the only time that we consider buying. Well, anyway hubby said that it was buttered chicken recipe but I said it looked and tasted more like chilly chicken to me. Sorry I won’t be posting here how the meal was prepared or how to cook it since I don’t know too. But one thing that most of this dishes have in common was spices and hotness so the very basic ingredients that I could taste there would be coriander, chili, onions, masala and butter, not the ghee.


Chili chicken put on the side on this voluptuous rice meal
chicken,rice


The chicken was cut into cubes and mostly meaty parts not the bones. It was lacking salt though what we just did was to add some salt to it. By the way, every order we make, they always include big chunks of onions and lemon wedge and with pickles. That big plate with rice was shared by the two of us since we eat on the same plate.
This chili chicken surely is hot and I am sure that it is not the kind of meal that would be loved by my folks back home. I am also limiting myself to not eat such but at times like this where I can also relax a bit when I am not cooking or rather I had nothing to prepare, I’d be compromising on eating such hot foods, tongue on the edge!

Tuesday, May 3, 2011

Chicken Sotanghon

This is the remaining sotanghon left on the pack I bought back home since I won’t be able to get some bean thread noodle or vermicelli like this. Anyway another chicken recipe to share which I am sure most of you know if you’re a Filipino.


Let's swim for Chicken Sotanghon Soup!
chicken sotanghon


Chicken Sotanghon soup is favored especially during cold rainy season just like Tinola recipe. I used to remember that there is really a similarity between the two although in Chicken sotanghon, you don’t include sayote or any green leafy veggie. I always like chicken sotanghon in a cup were I can always carry when I go to office since we do have hot and cold water dispenser. Even if it’s not that healthy to consider because of its ingredients, I still can taste the flavor of that chicken soup in an instant. Anyway here is my rendition of Chicken Sotanghon recipe.

Ingredients:

½ kilo chicken (cut into parts)
1 medium onion (chopped)
Fish sauce
1 lady finger chili
Sotanghon (vermicelli) 1 rolled portion
2 Garlic cloves (chopped)
Ginger (cut into thin strips)
Oil
Salt
Ground black pepper
Water


Check the vermicelli in this chicken soup
chicken soup


Preparation / Method on how to cook Chicken Sotanghon :

Step 1: Clean the chicken first by washing it in running water. Next you need to rub it with salt to remove the unpleasant odor.

Step 2: Prepare the pan and put the chicken pieces into it with half a teacup water and salt and let it simmer for some time. Once the water is drained, that is the time that you need to put oil.

Step 3: Sauté the chicken till it gets light brown once you put the cooking oil. The next step will be putting the garlic first and then the onions. Stir the chicken well together with the ingredients and once your onion is light brown in color, you can now put your ginger which is cut into strips before adding some fish sauce for about 2-3 tbsp.

Step 4: The next step will be adding the lady finger chili as you put ample enough of water into your chicken. You can also use chicken stock if you like or add some chicken bouillon cubes into the water that you place for your soup. Don’t worry, this recipe is a soup, so you can let those chicken pieces swim a lot.

Sunday, May 1, 2011

Noodle Sunday

I didn’t cooked today so I just asked hubby to buy something to eat which is noodles. Well the only noodle type which I can eat here without complaint is their egg noodle. I don’t like the vermicelli in India since it is small, cut into bits and was never the type of vermicelli or bean thread that I used to enjoy when I am in my country Philippines.


Egg Noodles with Mushroom and Capsicum
Photobucket


The noodles that they say “Chinese cuisines” here in India are mainly egg noodles even if we know that there are lots of varieties of noodles from China itself or from my own country. I never had pancit here like palabok or pancit luglug, pancit malabon, pancit lomi, pancit guisado (or bean thread noodle). Not to mention some Japanese noodles like Ramen and other thin strips of noodles.

What I noticed on noodles here even if it’s in a cup or packed was that it drains the water out of it. Meaning, when I cooked a packet of noodle soup (just like Maggi) for example, well even if how much water I put in, the noodles would sip it and there you go, no soup to sip since the noodles drink it all. It is kinda weird for me because I do enjoy sipping noodle soups back home, when in here, yucks it is really disappointing, it pot gets dry and the noodles so sticky since it gets to absorb all the water.


Noodles with red chili paste for extra flavorings
Photobucket


Anyway, so much for the complaints and I just wanted to share the taste of which this dish gives me. Its kinda smoky in taste, maybe the Chef burnt it since the smell itself tells me it’s been burnt on a high flame. It has button mushrooms into it with veggies such as shredded cabbage, thin stripped capsicum which is still raw and carrots.
They always give extra flavorings in their noodles like soya sauce, masala or some spicy sauce which you put into your noodle. The one that was red there was the paste which you mixed with the noodles to give it a spicy flavor. Well it is up to you if you like to combine it or not, anyway it’s free.

I was asking to match it with a mutton curry but hubby wasn’t able to find any mutton dish at that restaurant so I said, okay, we will just have this noodle and eat our watermelon afterwards. I just hope I can cook something at night with that remaining chicken meat. Anyway, have a nice and relaxing Sunday and don’t forget the Lord’s Day.

Subscribe via email